Seeing vs. Capturing: Using Lightroom’s AI Masking to Match Memory, Not the Camera
The camera saw dry desert. I saw deep reds, cool greens, and glowing sky. This tutorial shows how I used Lightroom’s AI tools to bring the scene back to life.


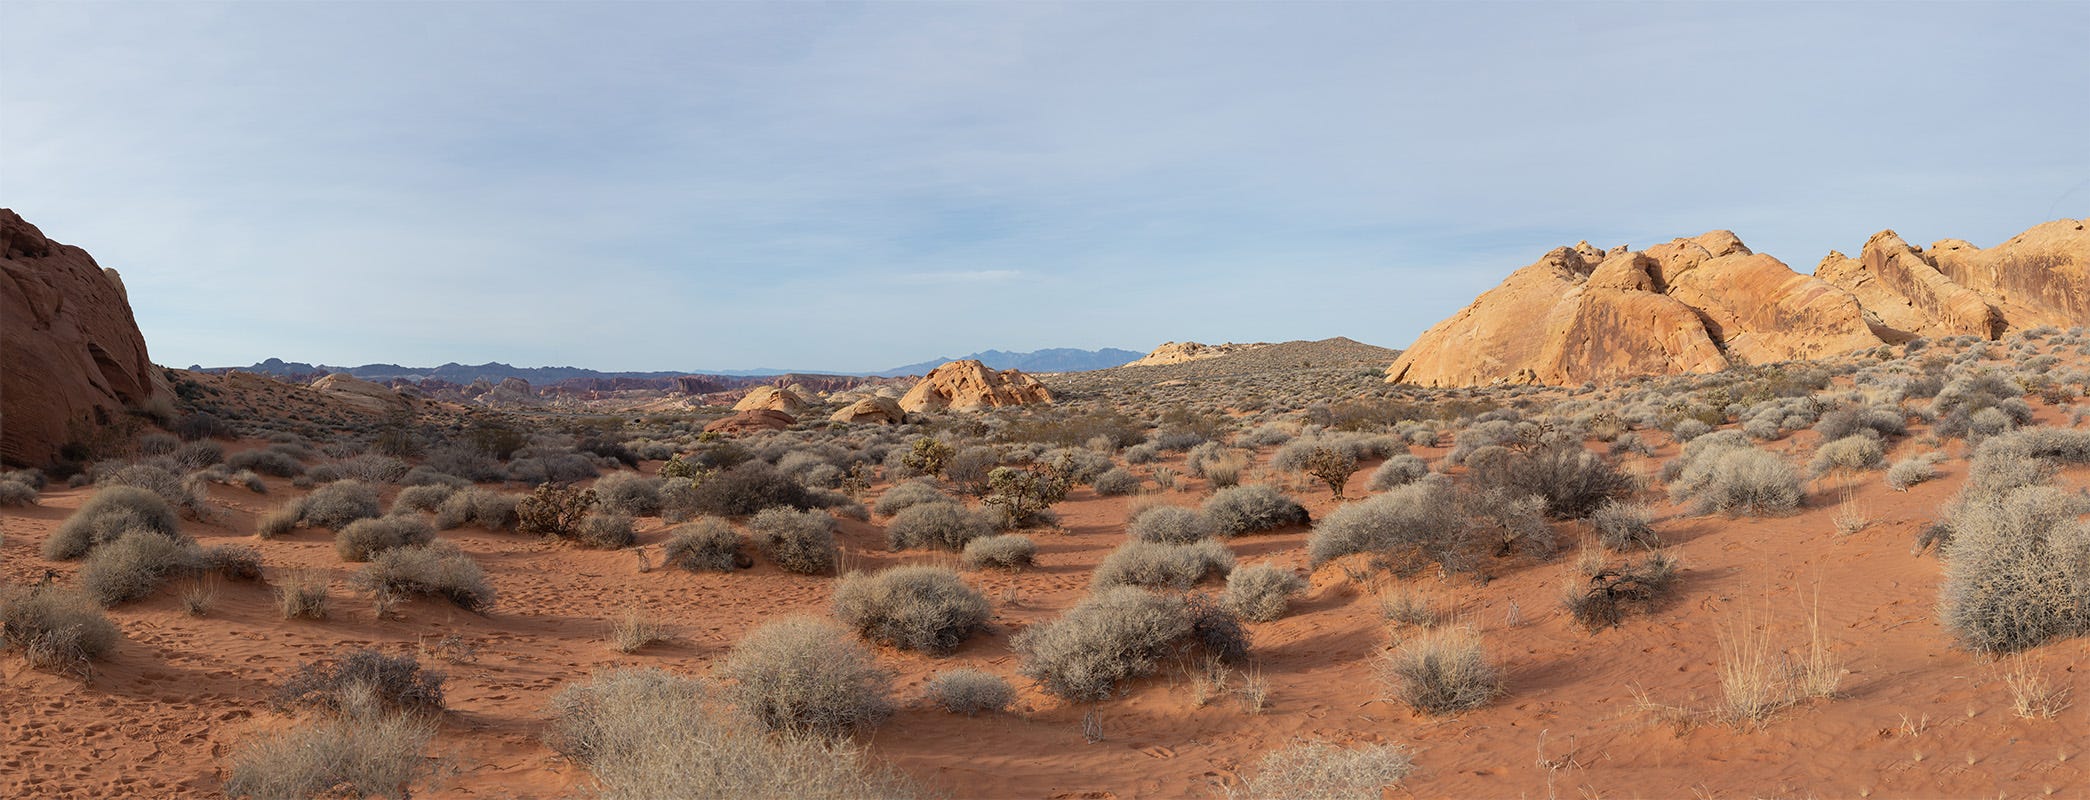
©Dennis Dunbar
This image has a little backstory.
A close friend, Anya Anti, wanted to visit the Valley of Fire on the last day of the WPPI conference in Las Vegas last March. I had tried to make this trip a couple of times before, but something always came up. This time, my wife Amy and I happily joined Anya for an afternoon outing—and I’m glad we did.
What struck me most when we arrived was the color. The ground was a deep, almost brick red. The bushes had this vibrant cyan/blue/green cast that danced in the sunlight. I wanted to capture a wide panorama that gave a sense of the scale—but more importantly, I wanted the color to reflect what we saw with our own eyes.
The camera got the scene. Lightroom stitched the files together beautifully. But the color? The RAW looked flat. Yellowish dirt. Muted green vegetation. It felt lifeless compared to what we saw.
Here’s how I used Lightroom’s AI masking tools to bring the photo back to life—and make it feel like the moment I stood there taking it in.
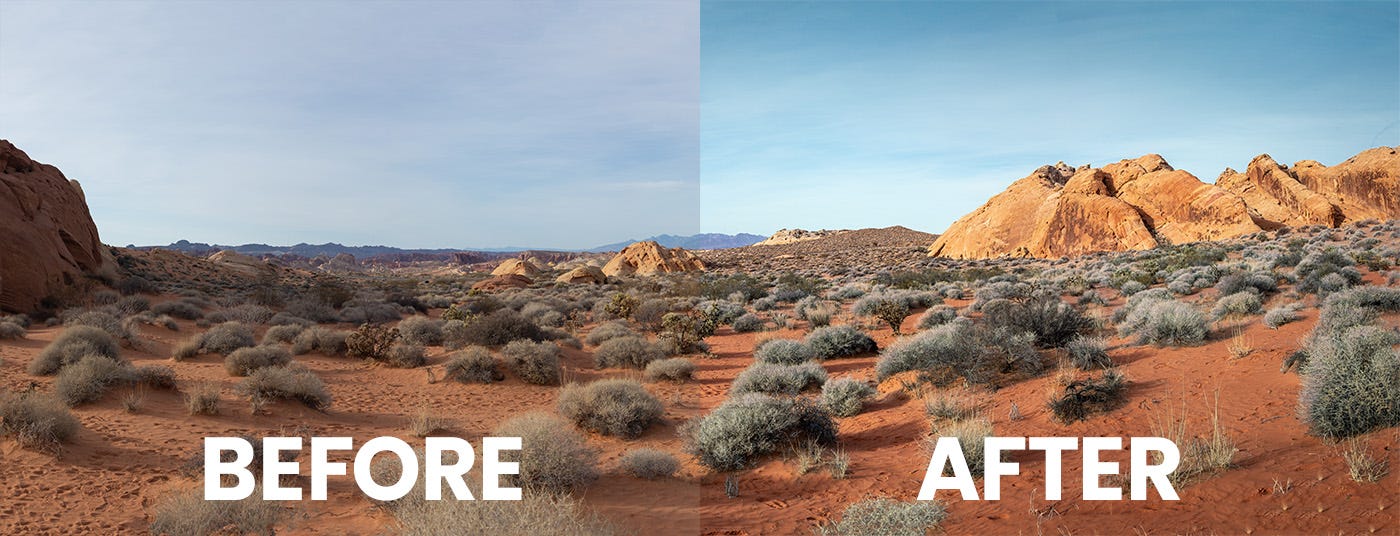
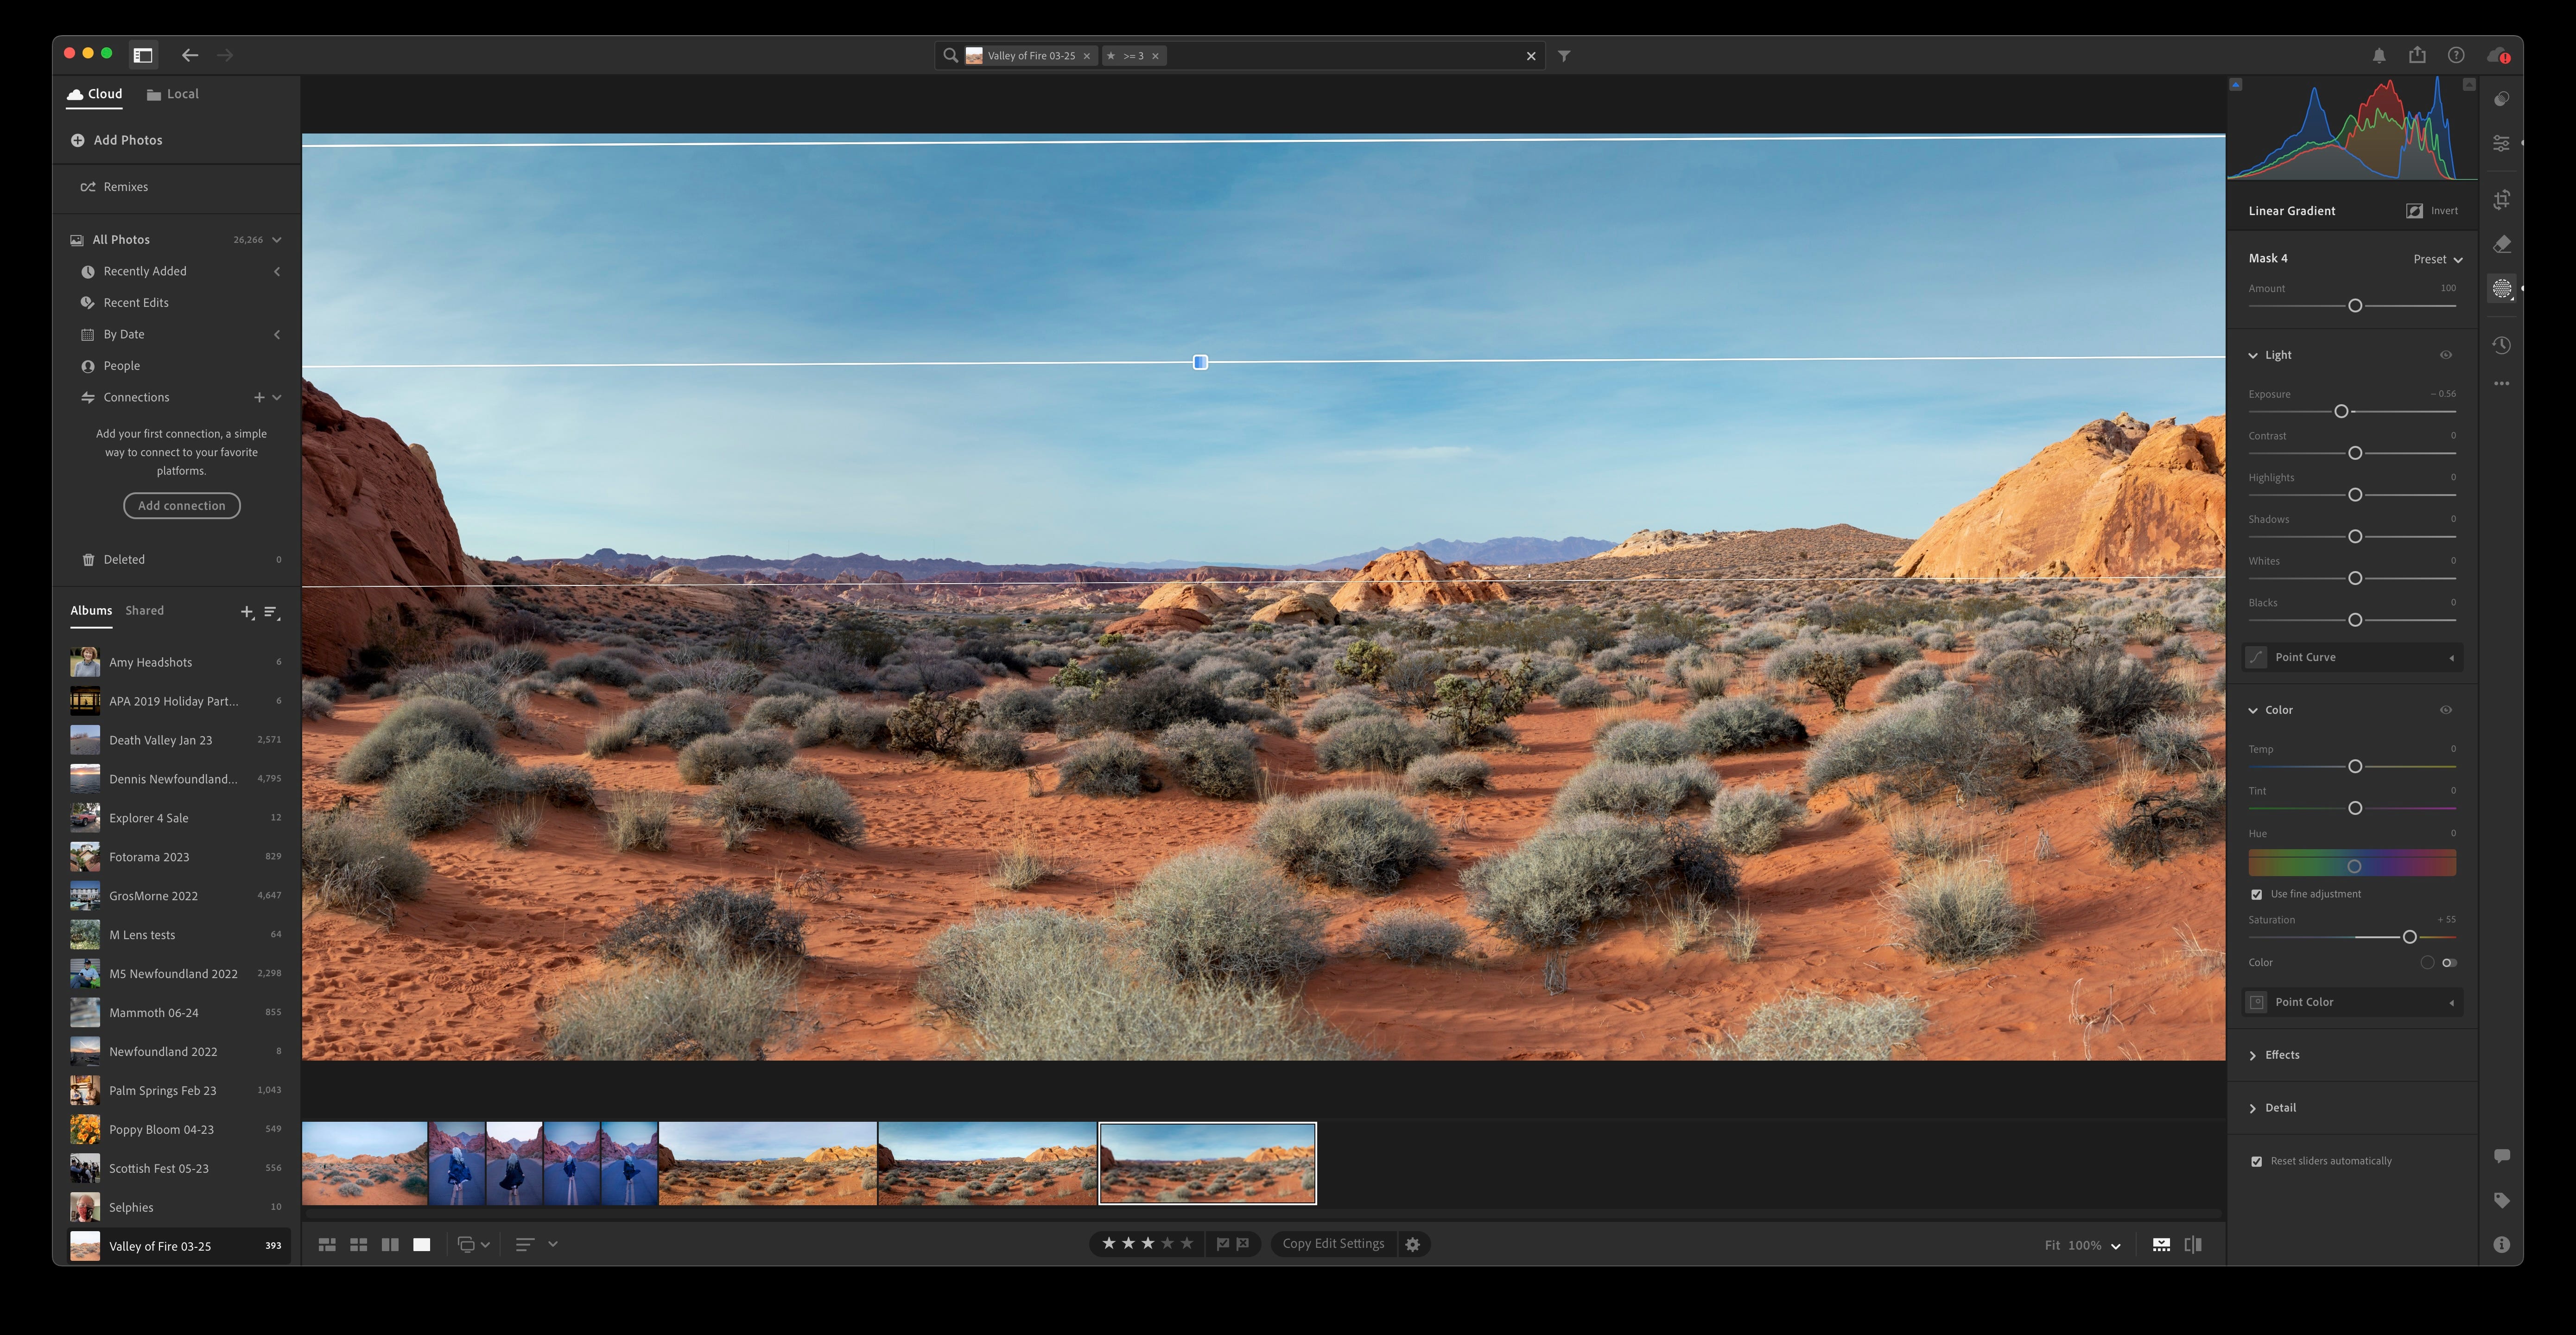
🔁 Before and After
Above: The RAW image straight out of camera—flat light, cool tones, little contrast.

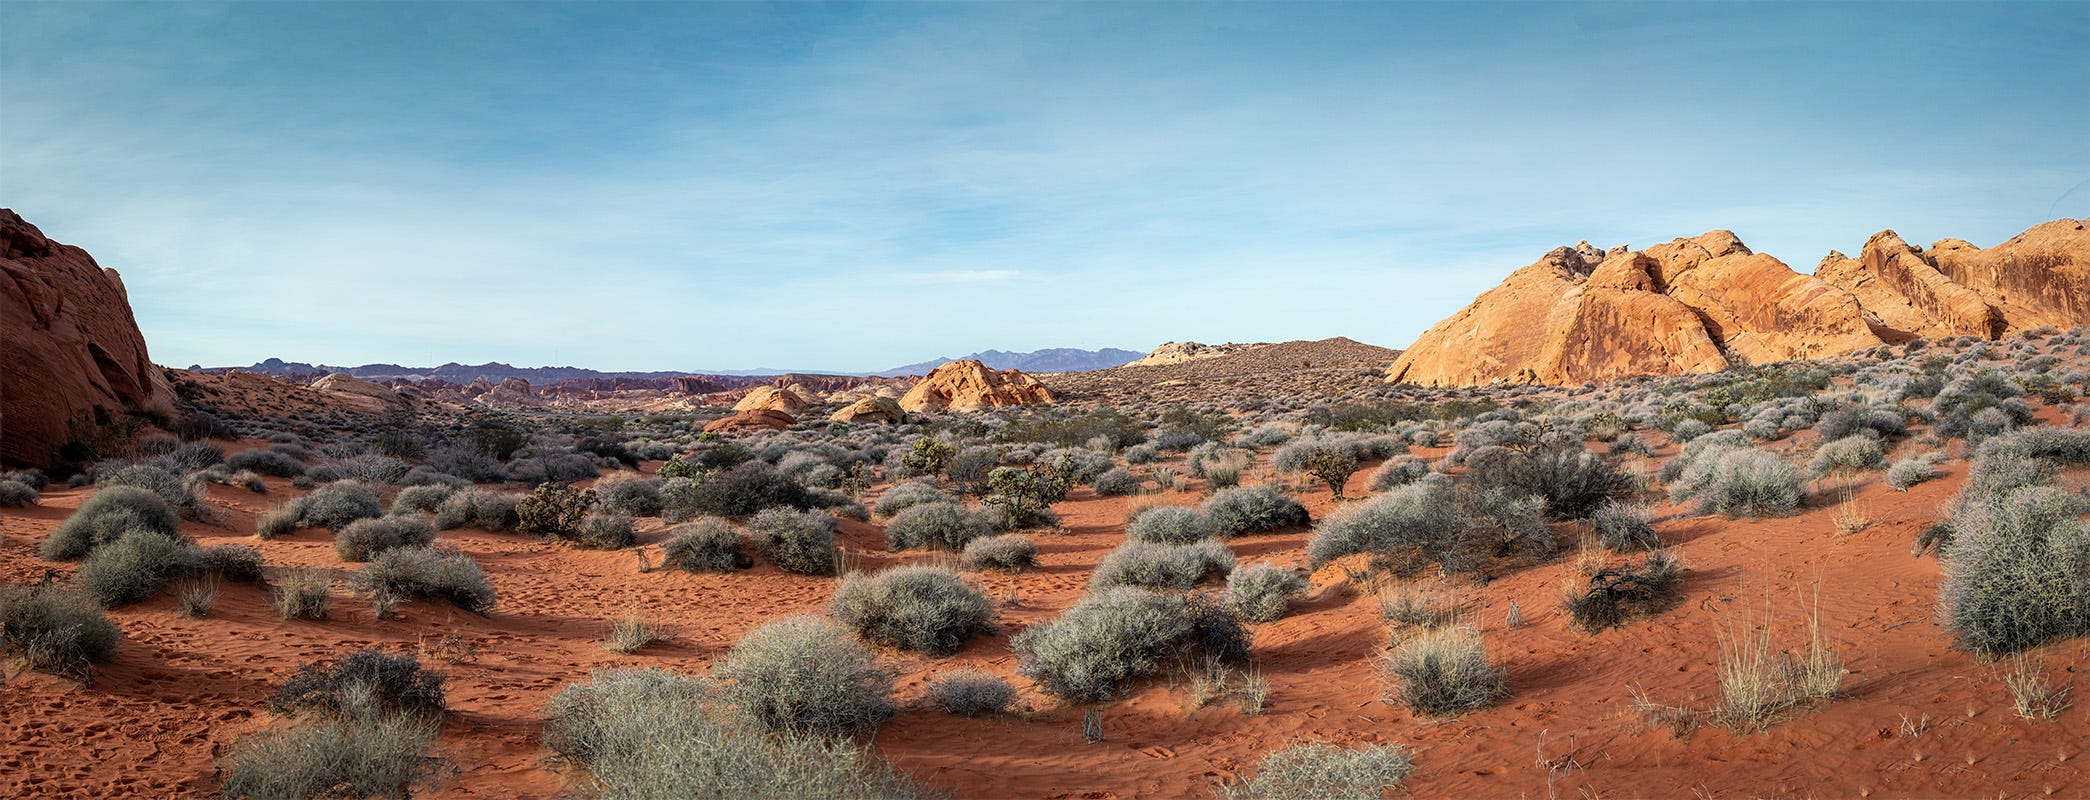
After: Color, texture, and contrast rebalanced to reflect the feeling of being there.
🧰 Step-by-Step: Rebuilding the Scene with AI Masks
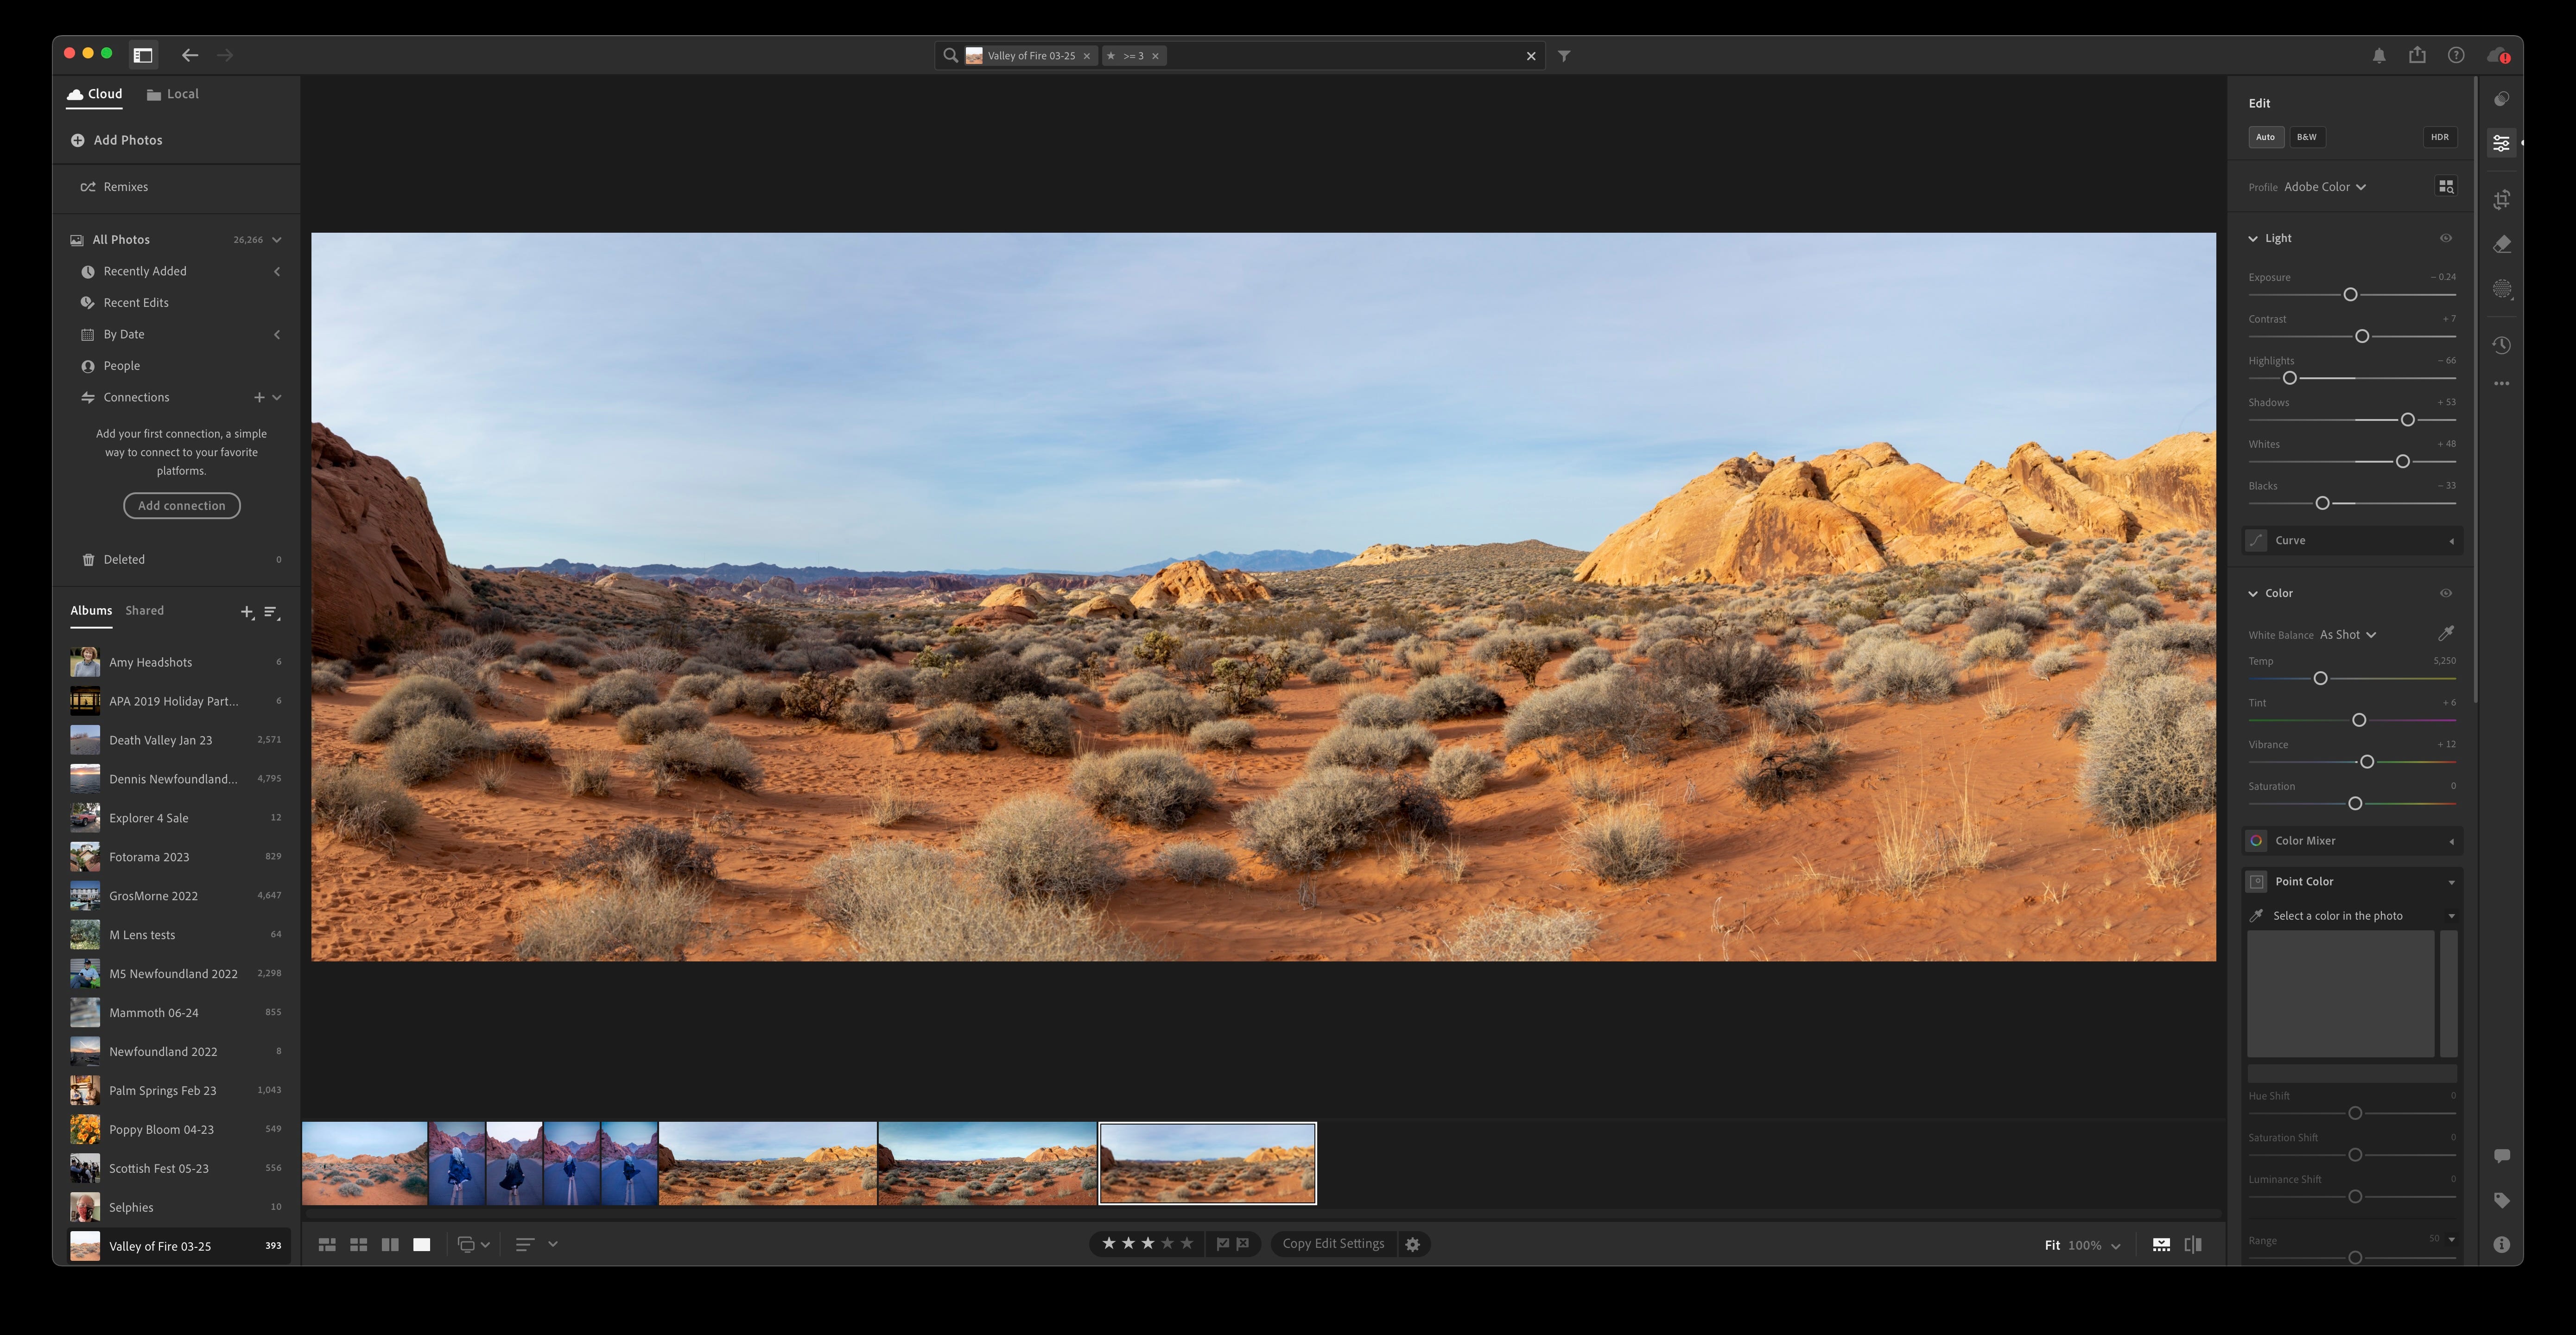
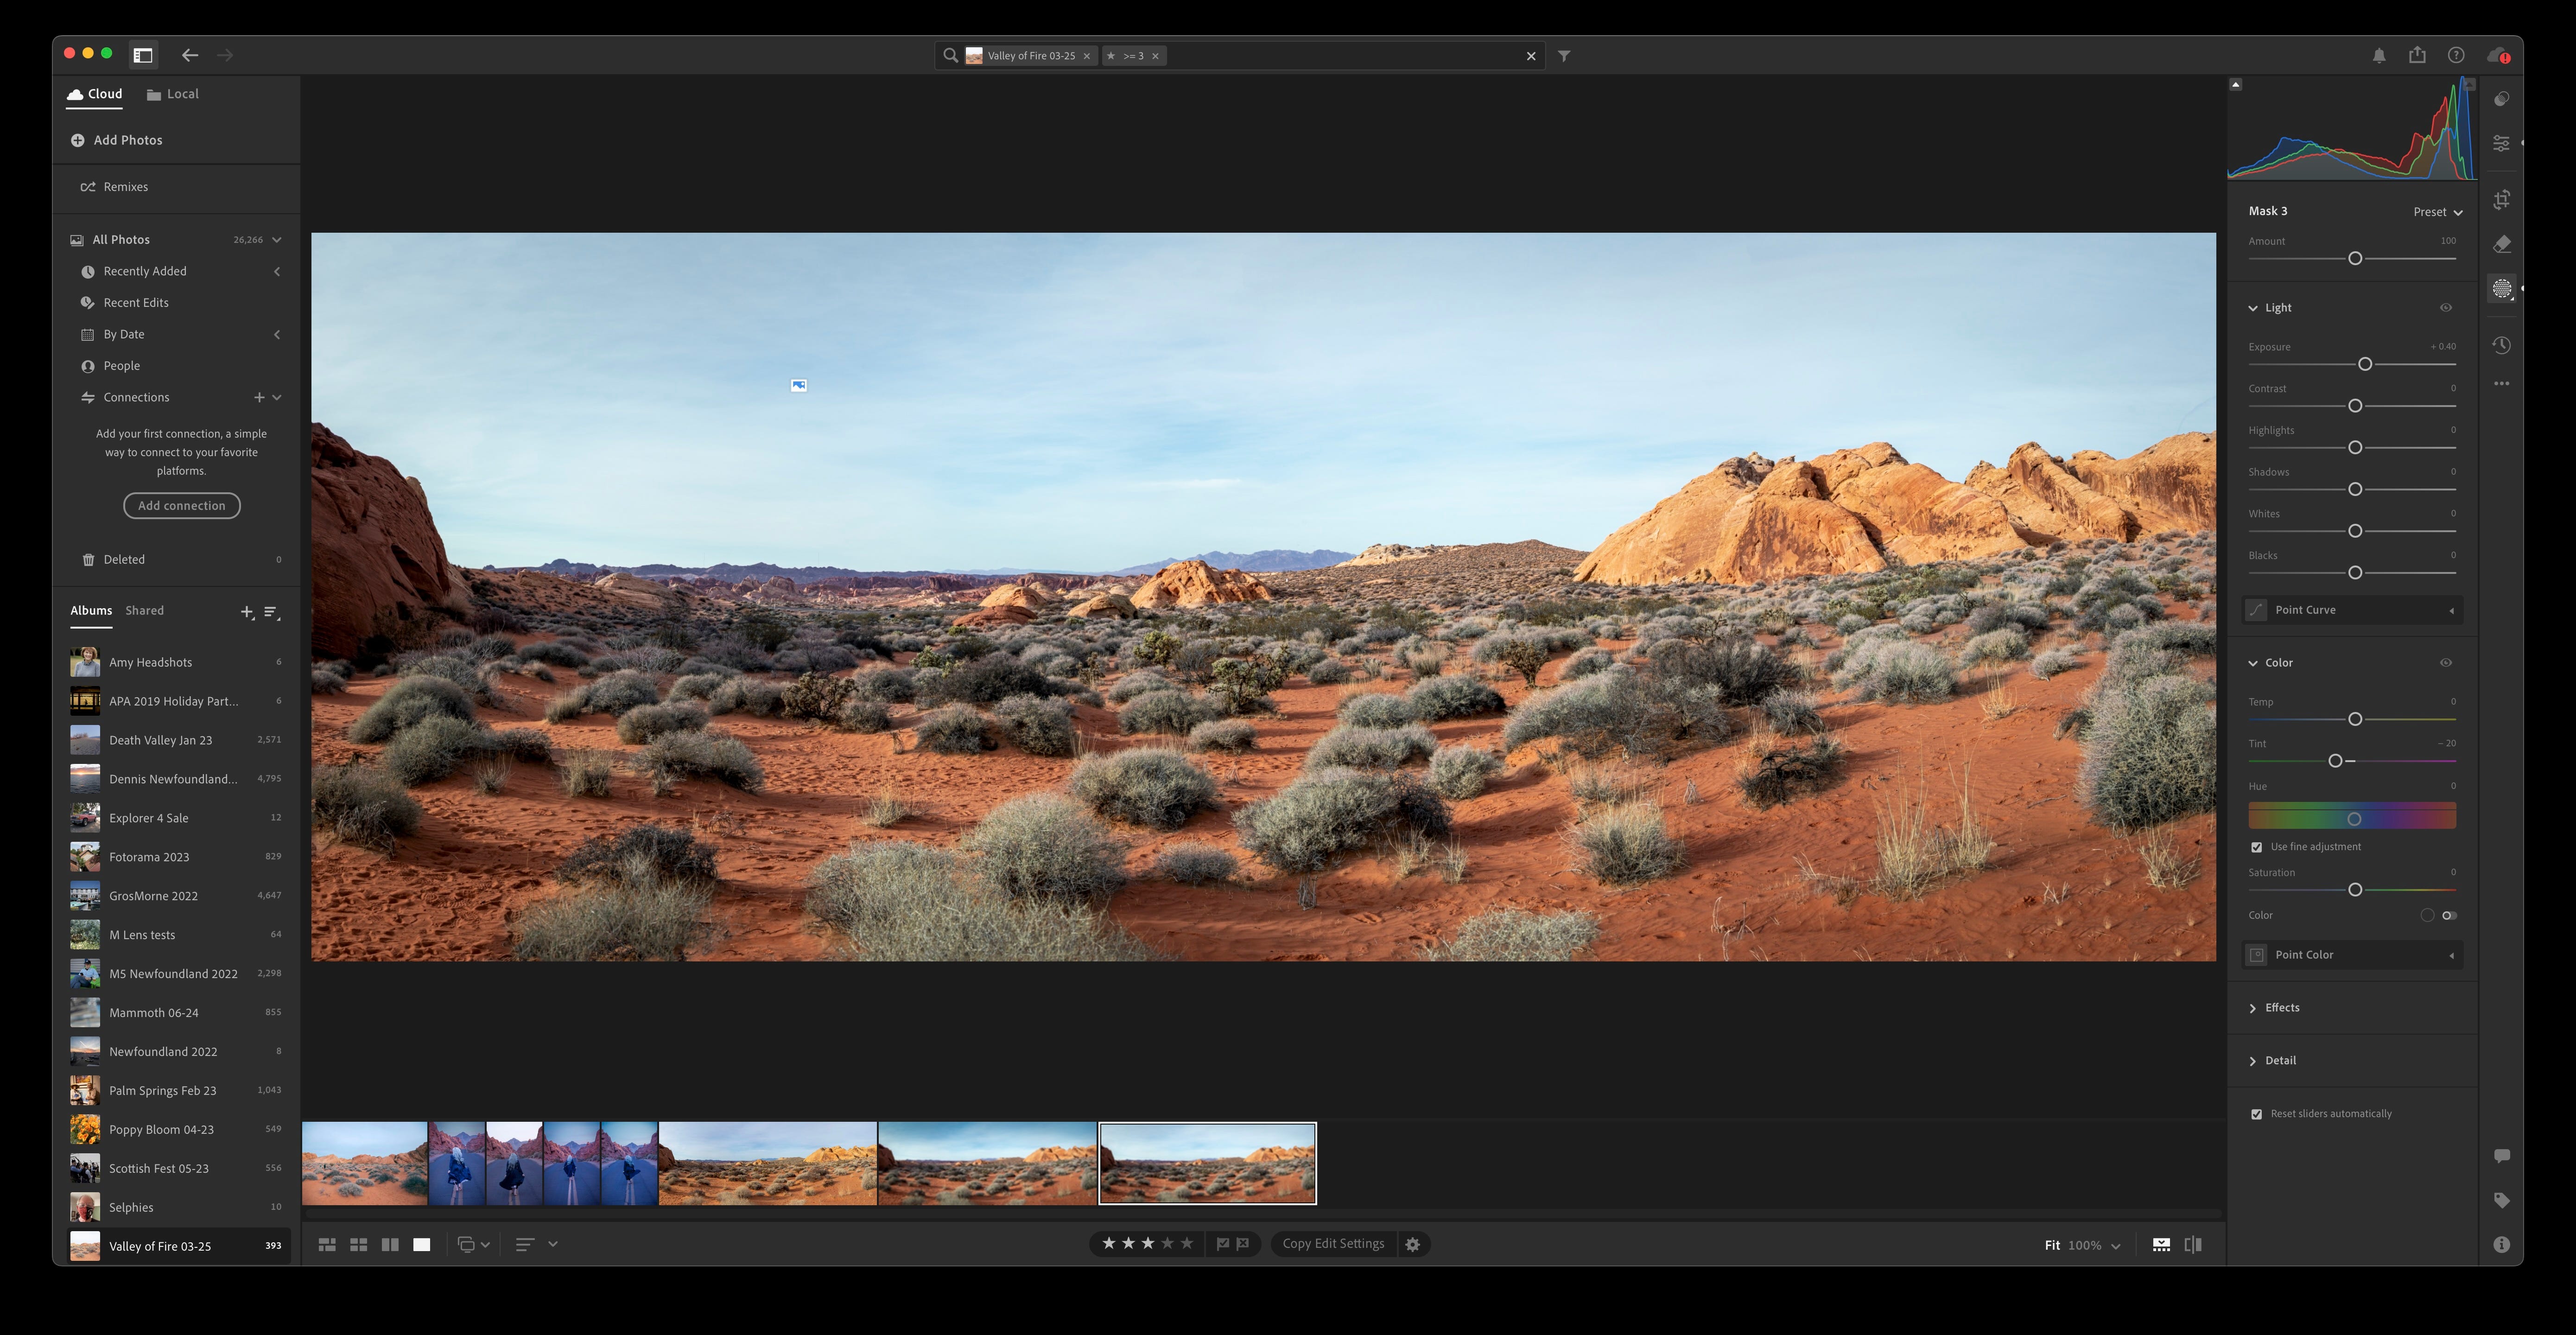
Step 1: Start with Basic Light and Color
I began with a general exposure adjustment—pulling up the shadows a bit and lowering the highlights. I also gave the overall color balance a nudge toward warmer tones and slightly increased vibrance. This established a good global base to build on.
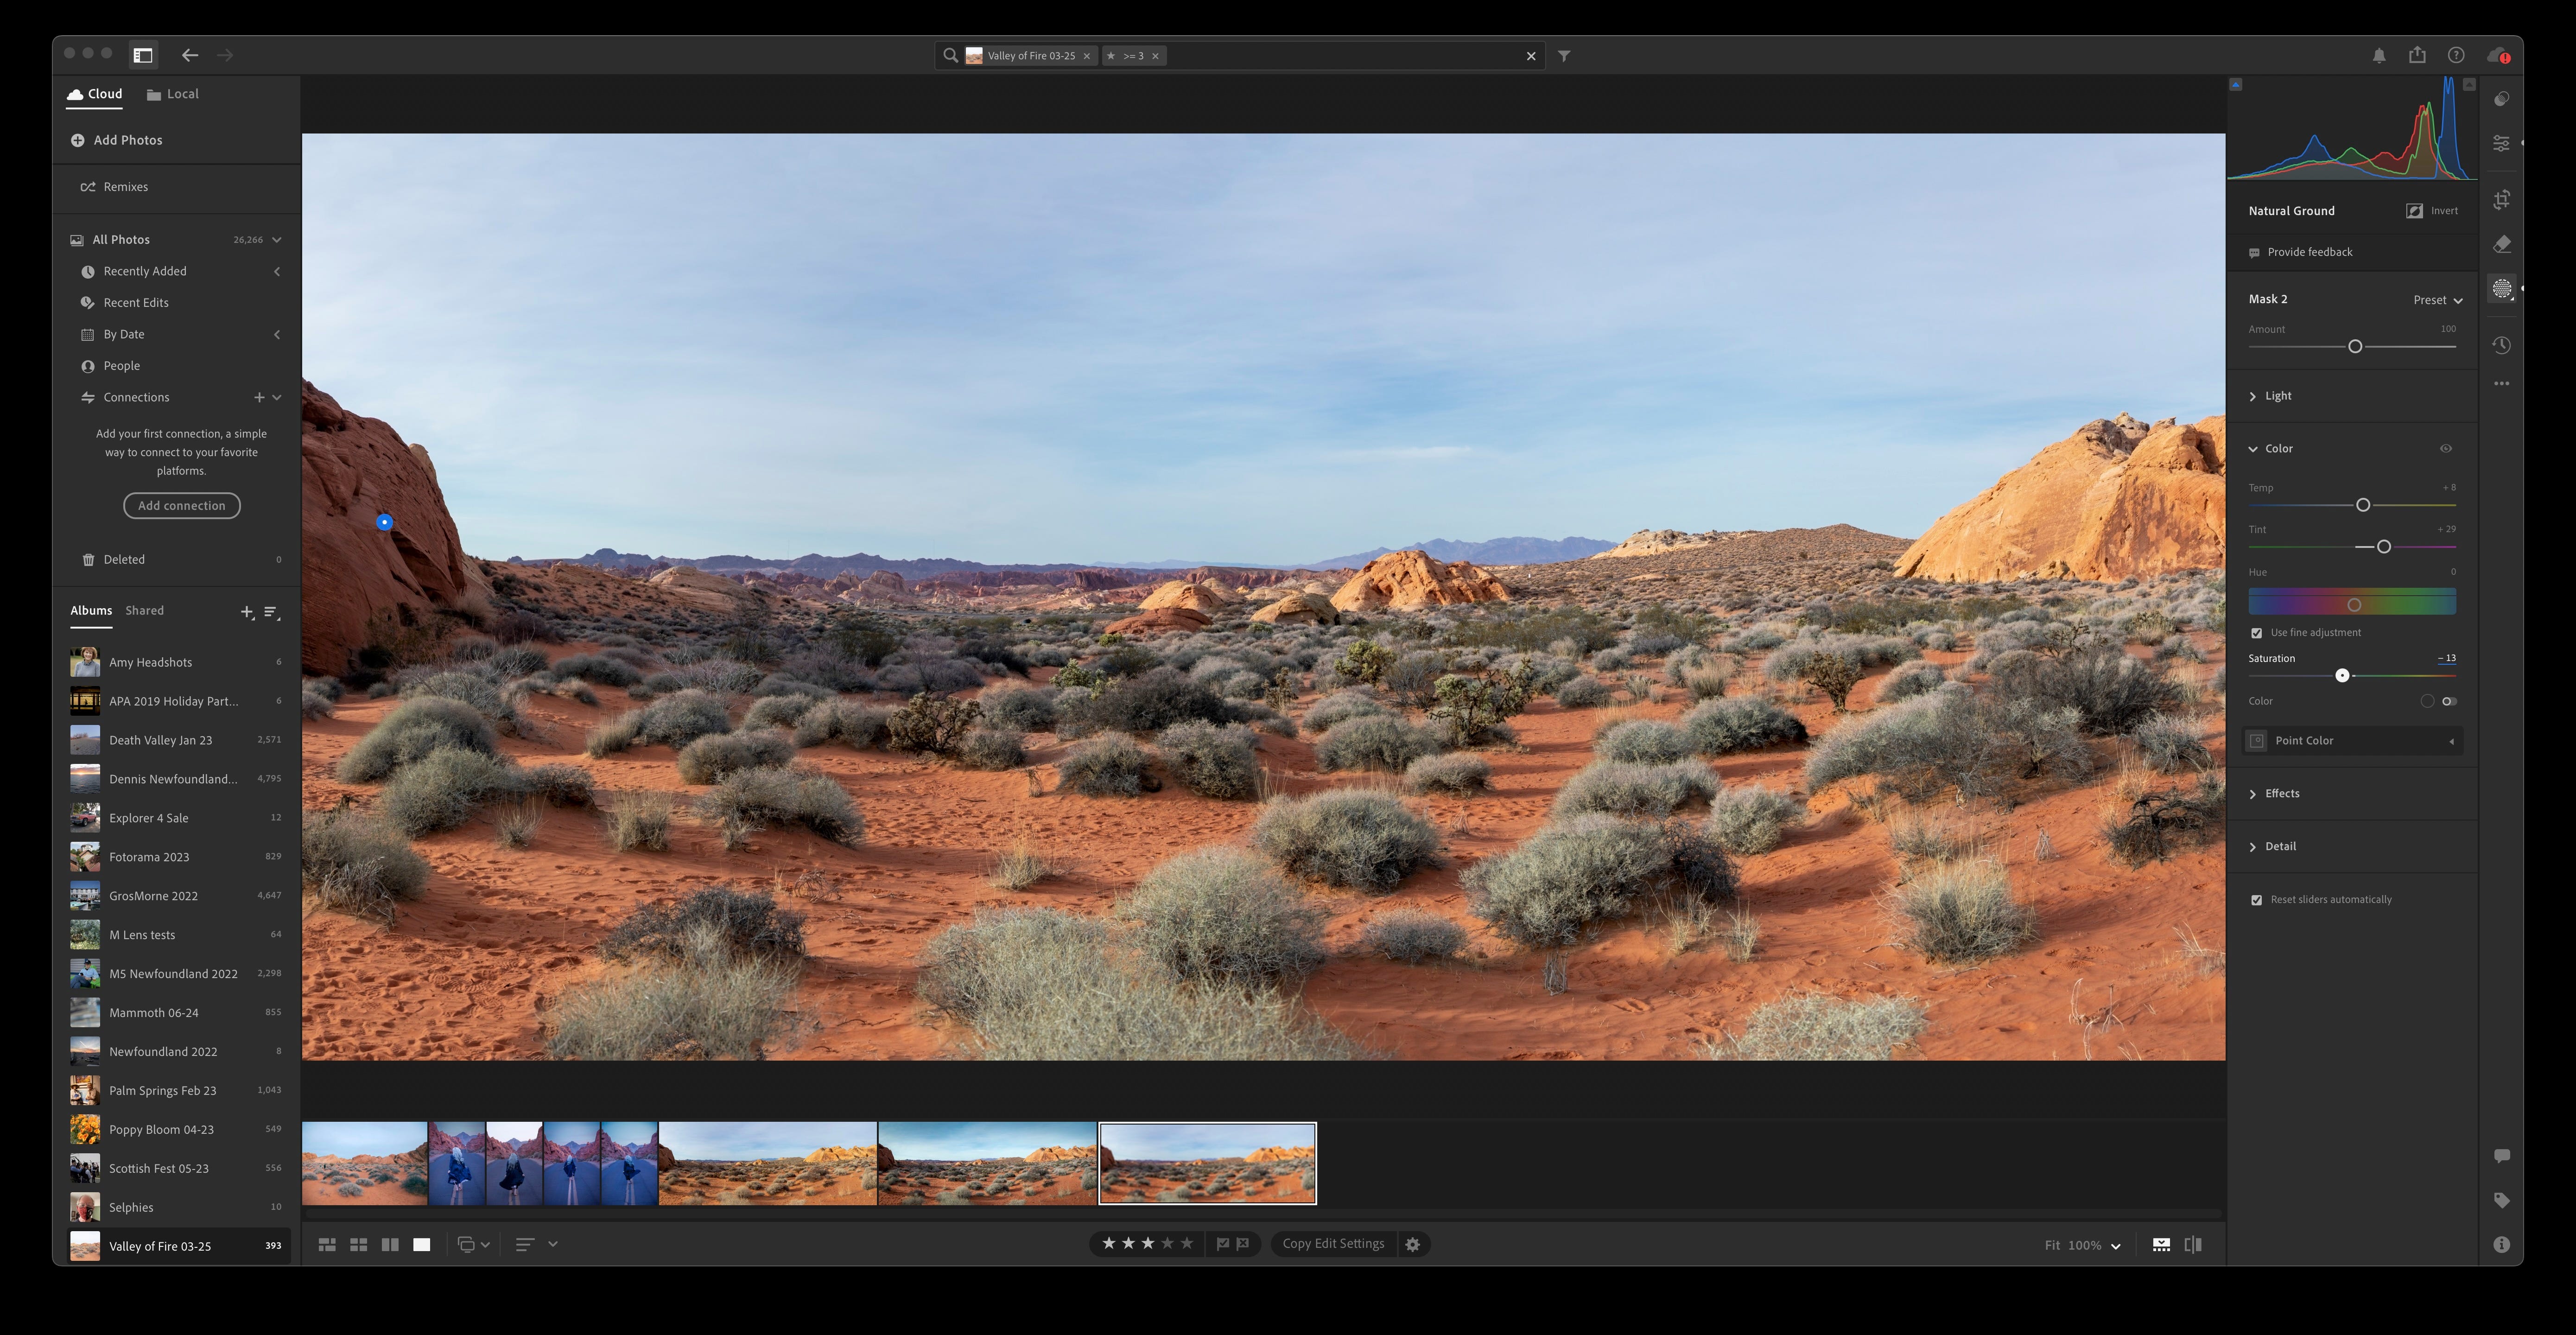
Step 2: Targeting the Vegetation
This is where the AI tools really shine. Using Lightroom’s new AI Landscape Mask, I selected just the vegetation. I added blue and green via the color sliders, then pulled back saturation slightly to keep things realistic. This brought the bushes and ground cover closer to the way they looked to my eye: cool-toned with a hint of life.
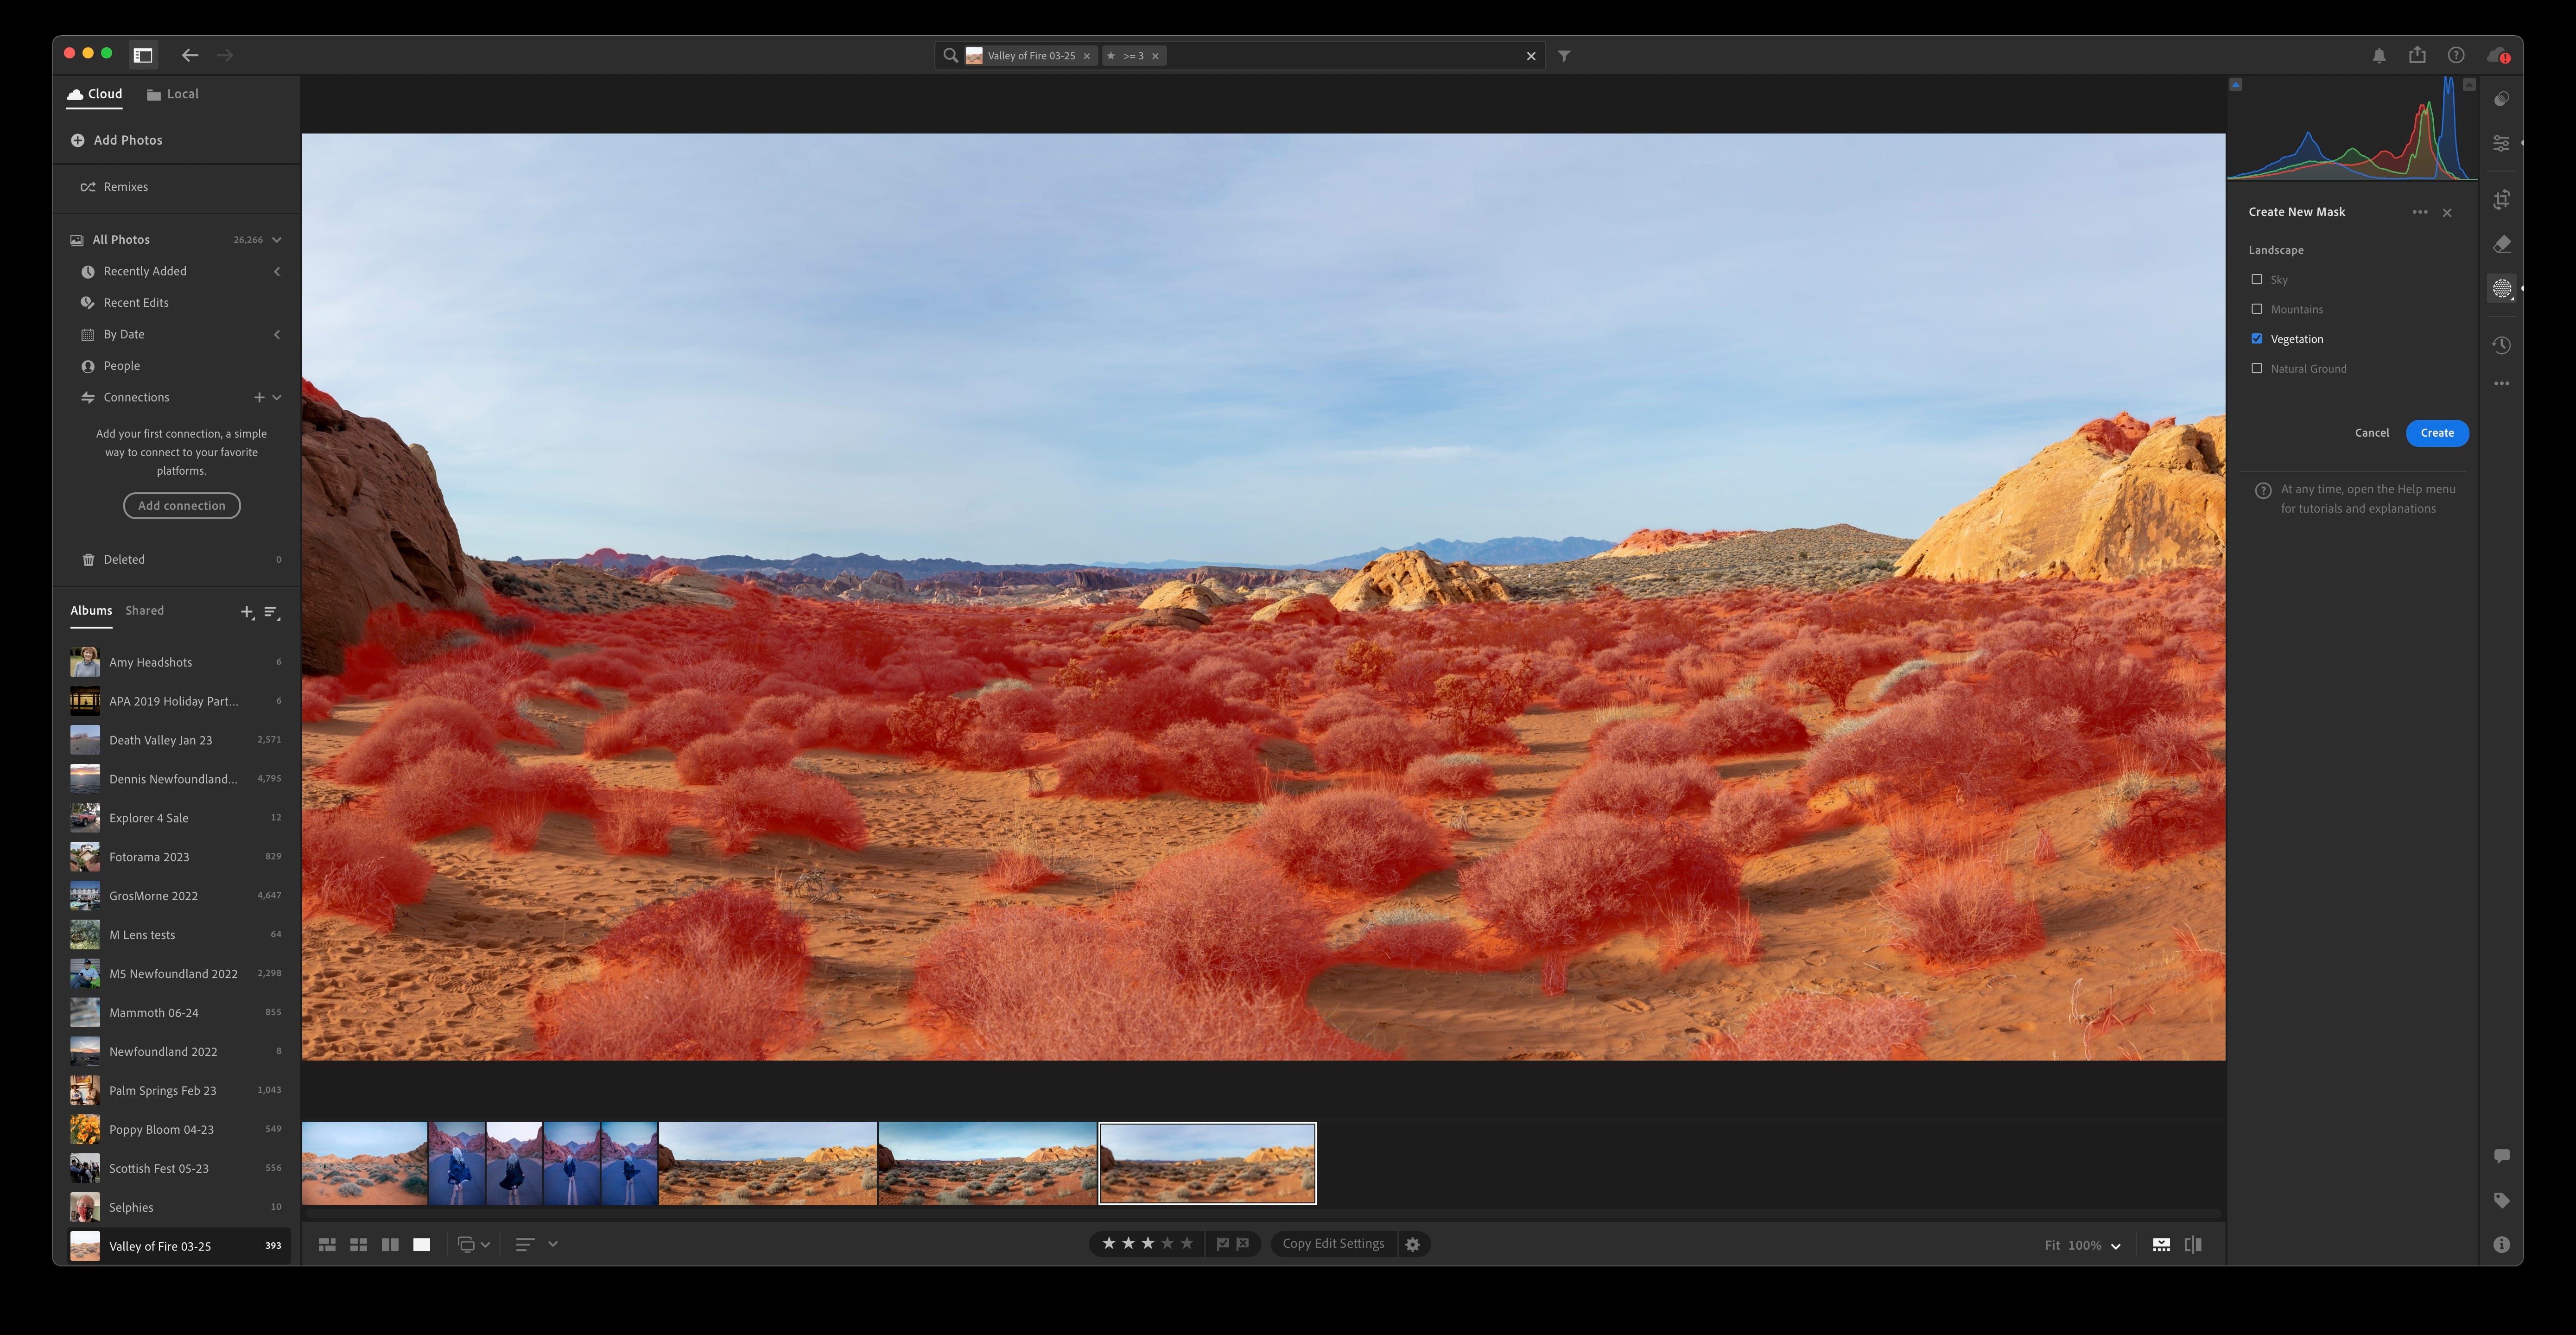

📷 Mask and Adjustment: Vegetation only
Step 3: Adjusting the Ground
Next, I used the AI’s Natural Ground mask—again, part of the Landscape Mask tool—to isolate the reddish earth. I added a touch of magenta and yellow, which brought out the richness in the soil, then dropped the saturation to dial back the cartoonish feel.
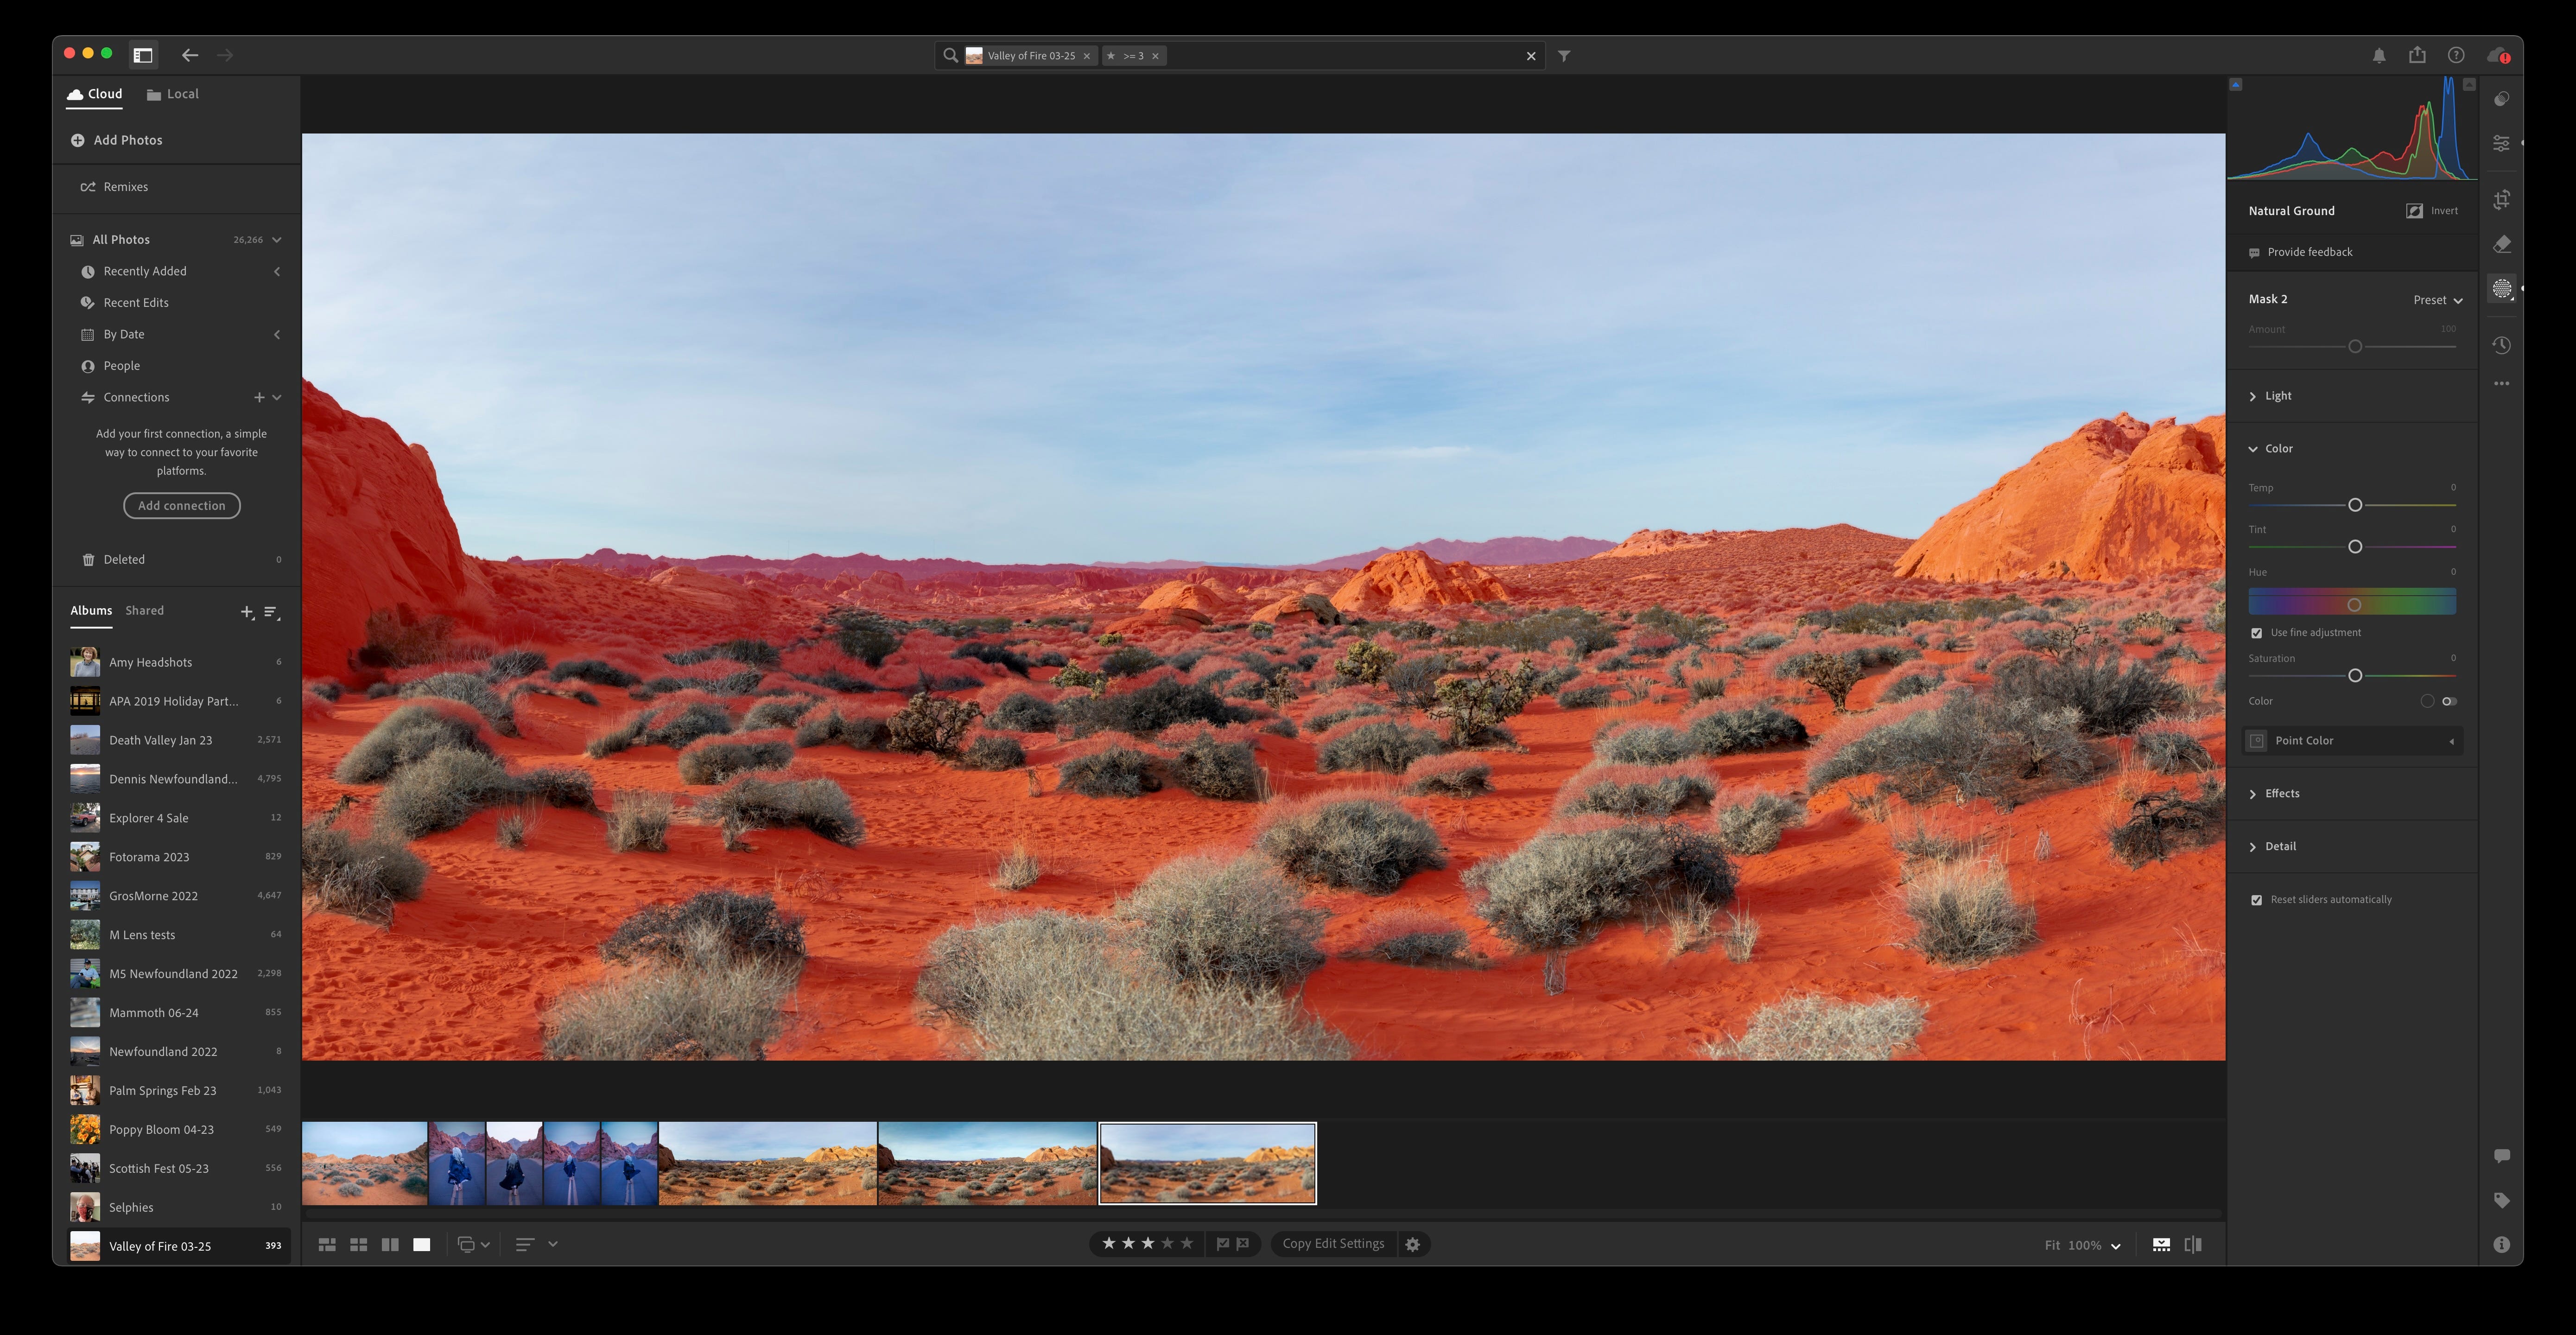
📷 Mask and Color Adjustment: Natural ground tones
Step 4: Cooling the Sky
I wanted the sky to feel cooler and more cyan, to create a pleasing contrast with the warm foreground. The AI Sky Mask did a perfect job selecting only the sky, even around complex edges. I then shifted the sky’s hue toward blue and pulled the tint slightly into the cyan-magenta range.
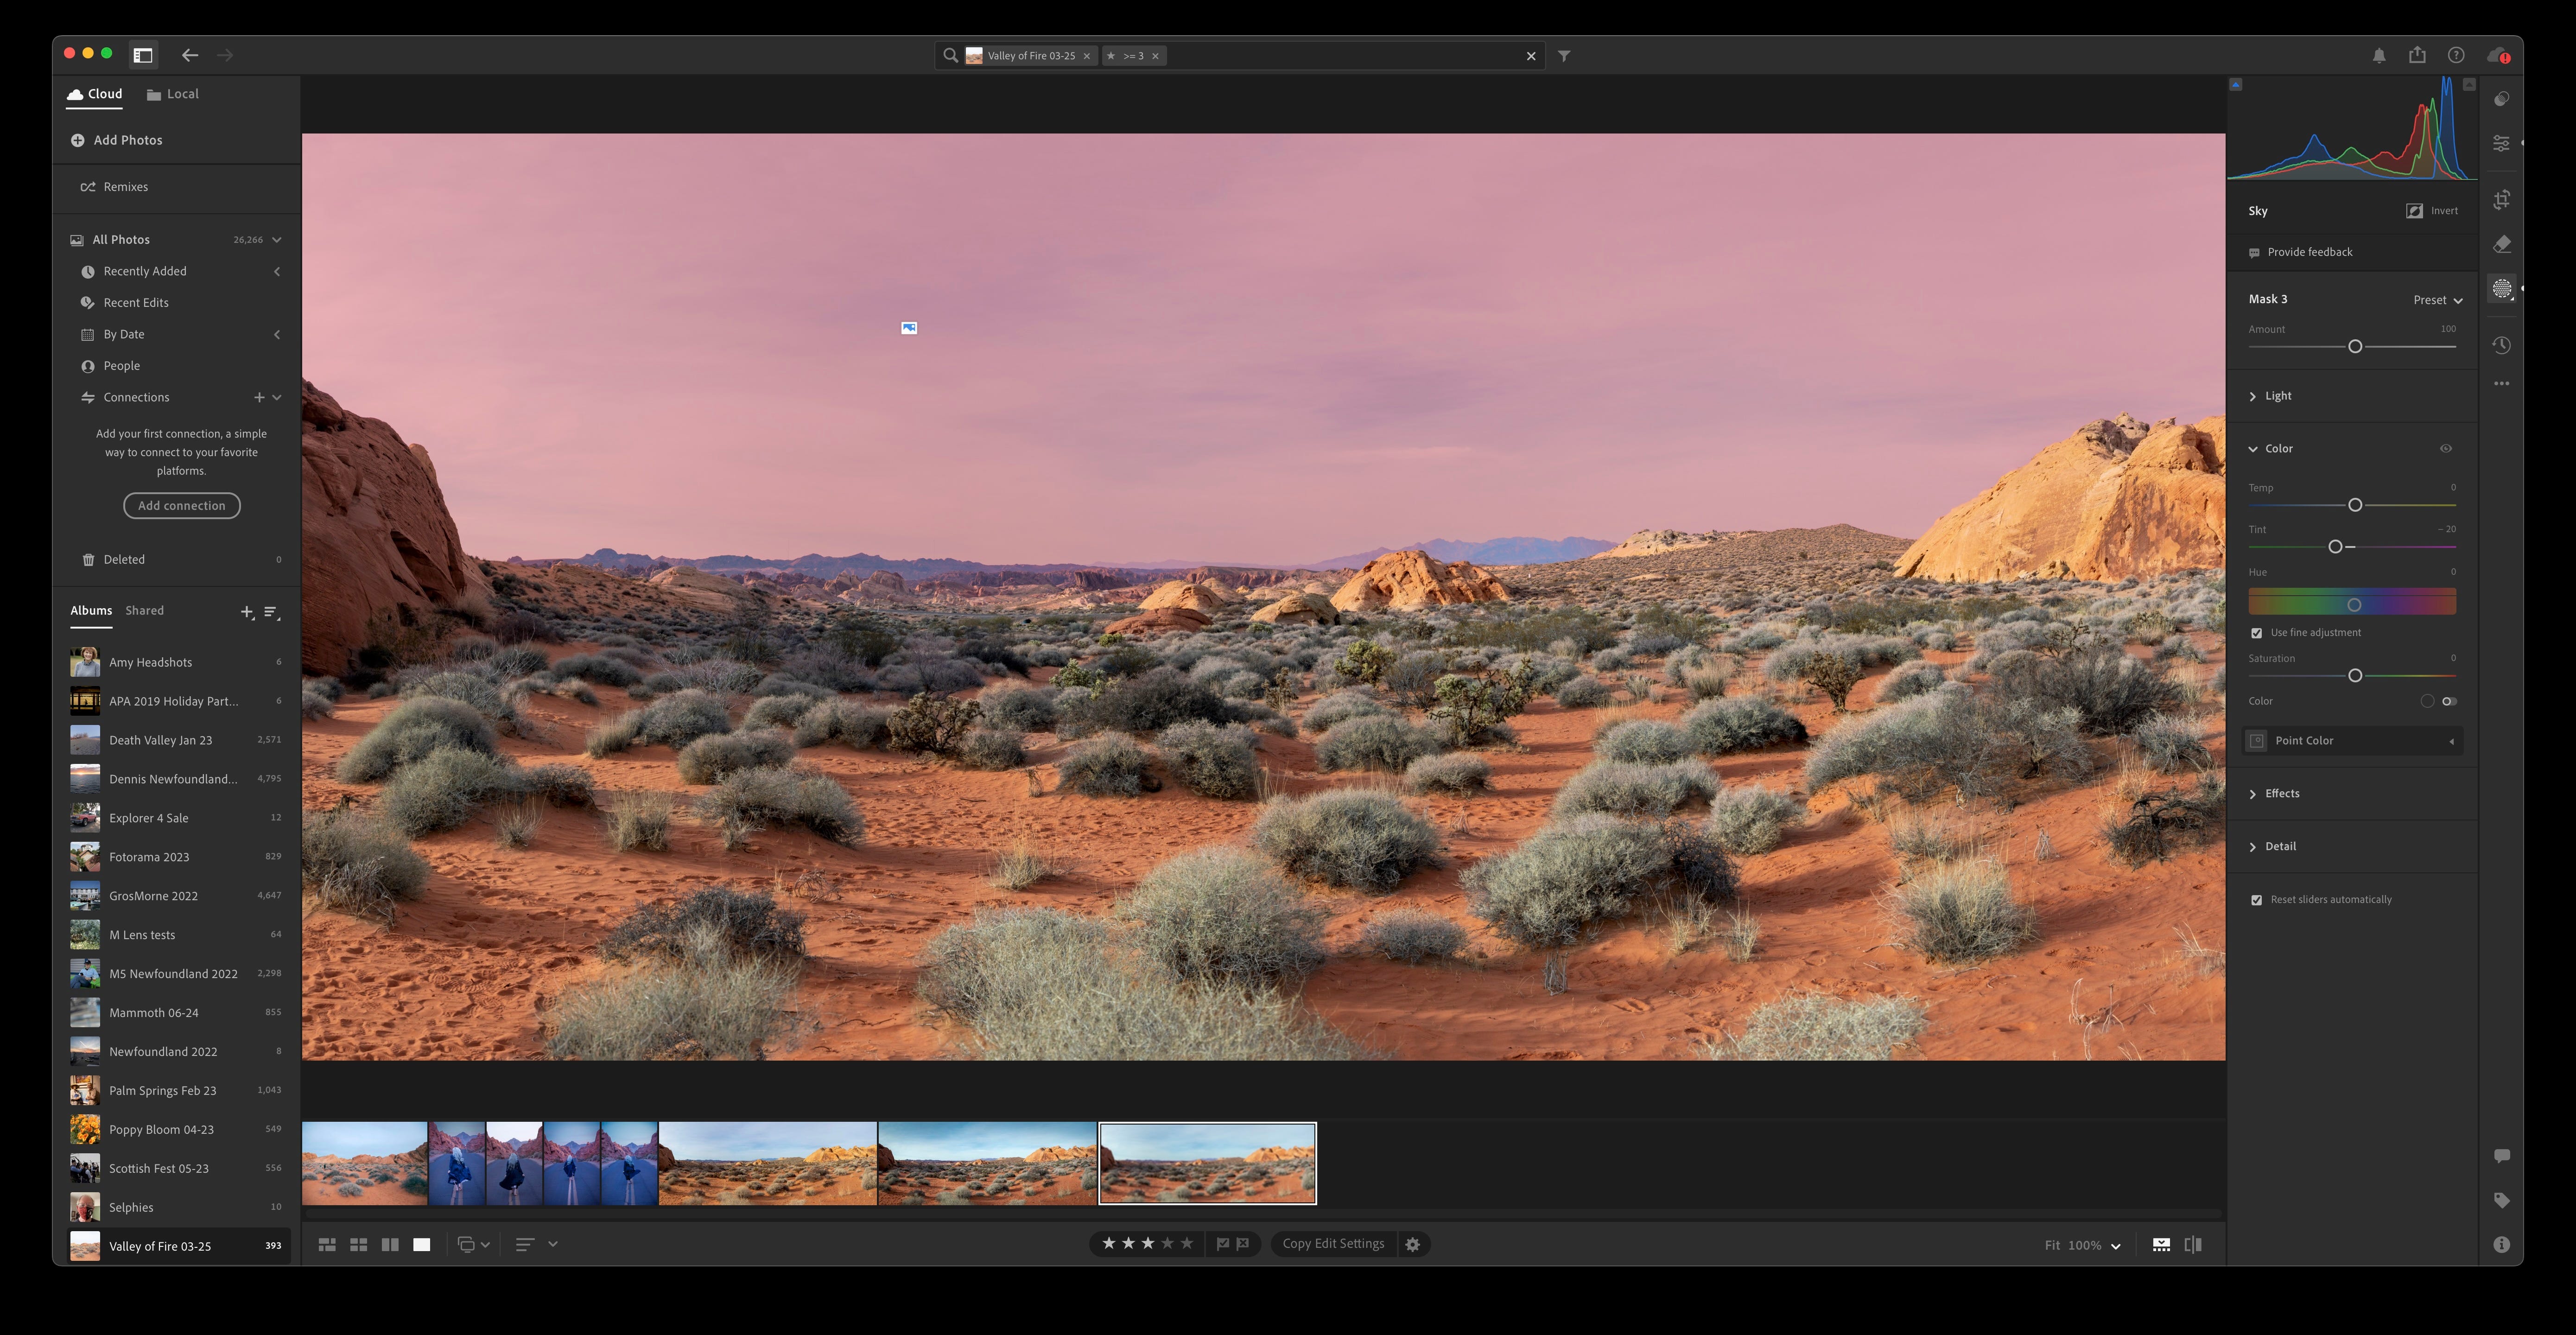
📷 Sky color targeting using AI mask
Step 5: Darkening the Top of the Sky
To give the sky a bit more depth and help hold the viewer’s eye in the frame, I used a Linear Gradient Mask from the top down and pulled down the exposure slightly.
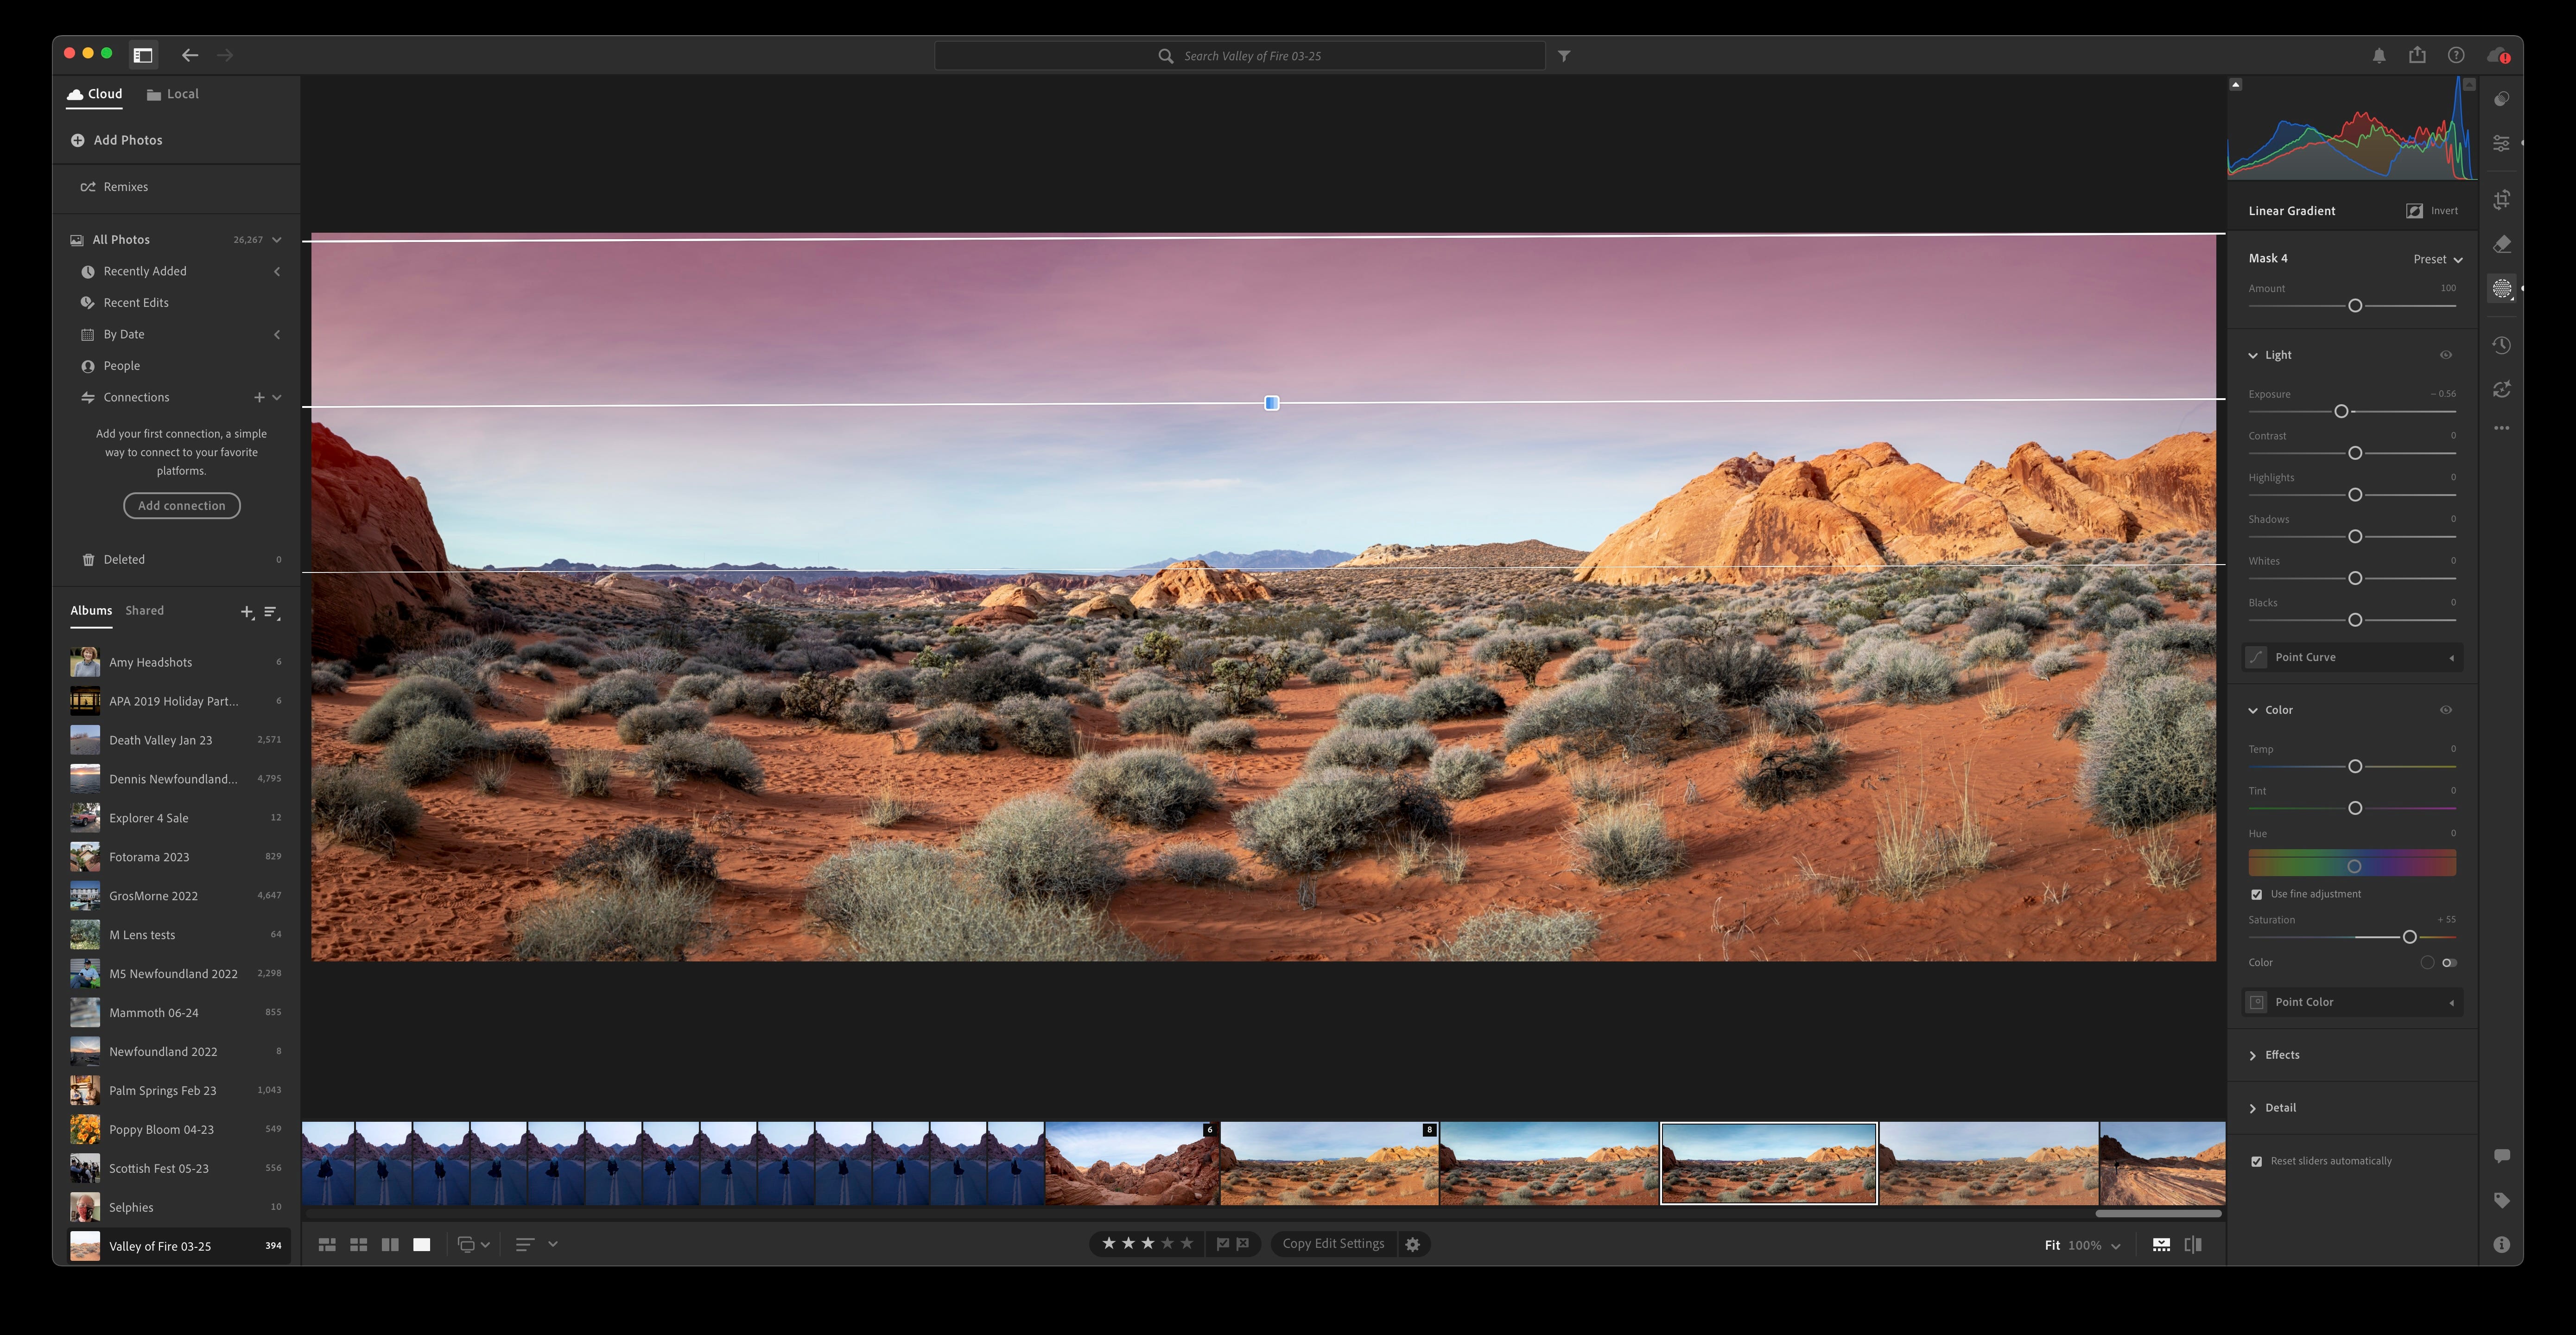
📷 Linear Gradient to darken upper sky
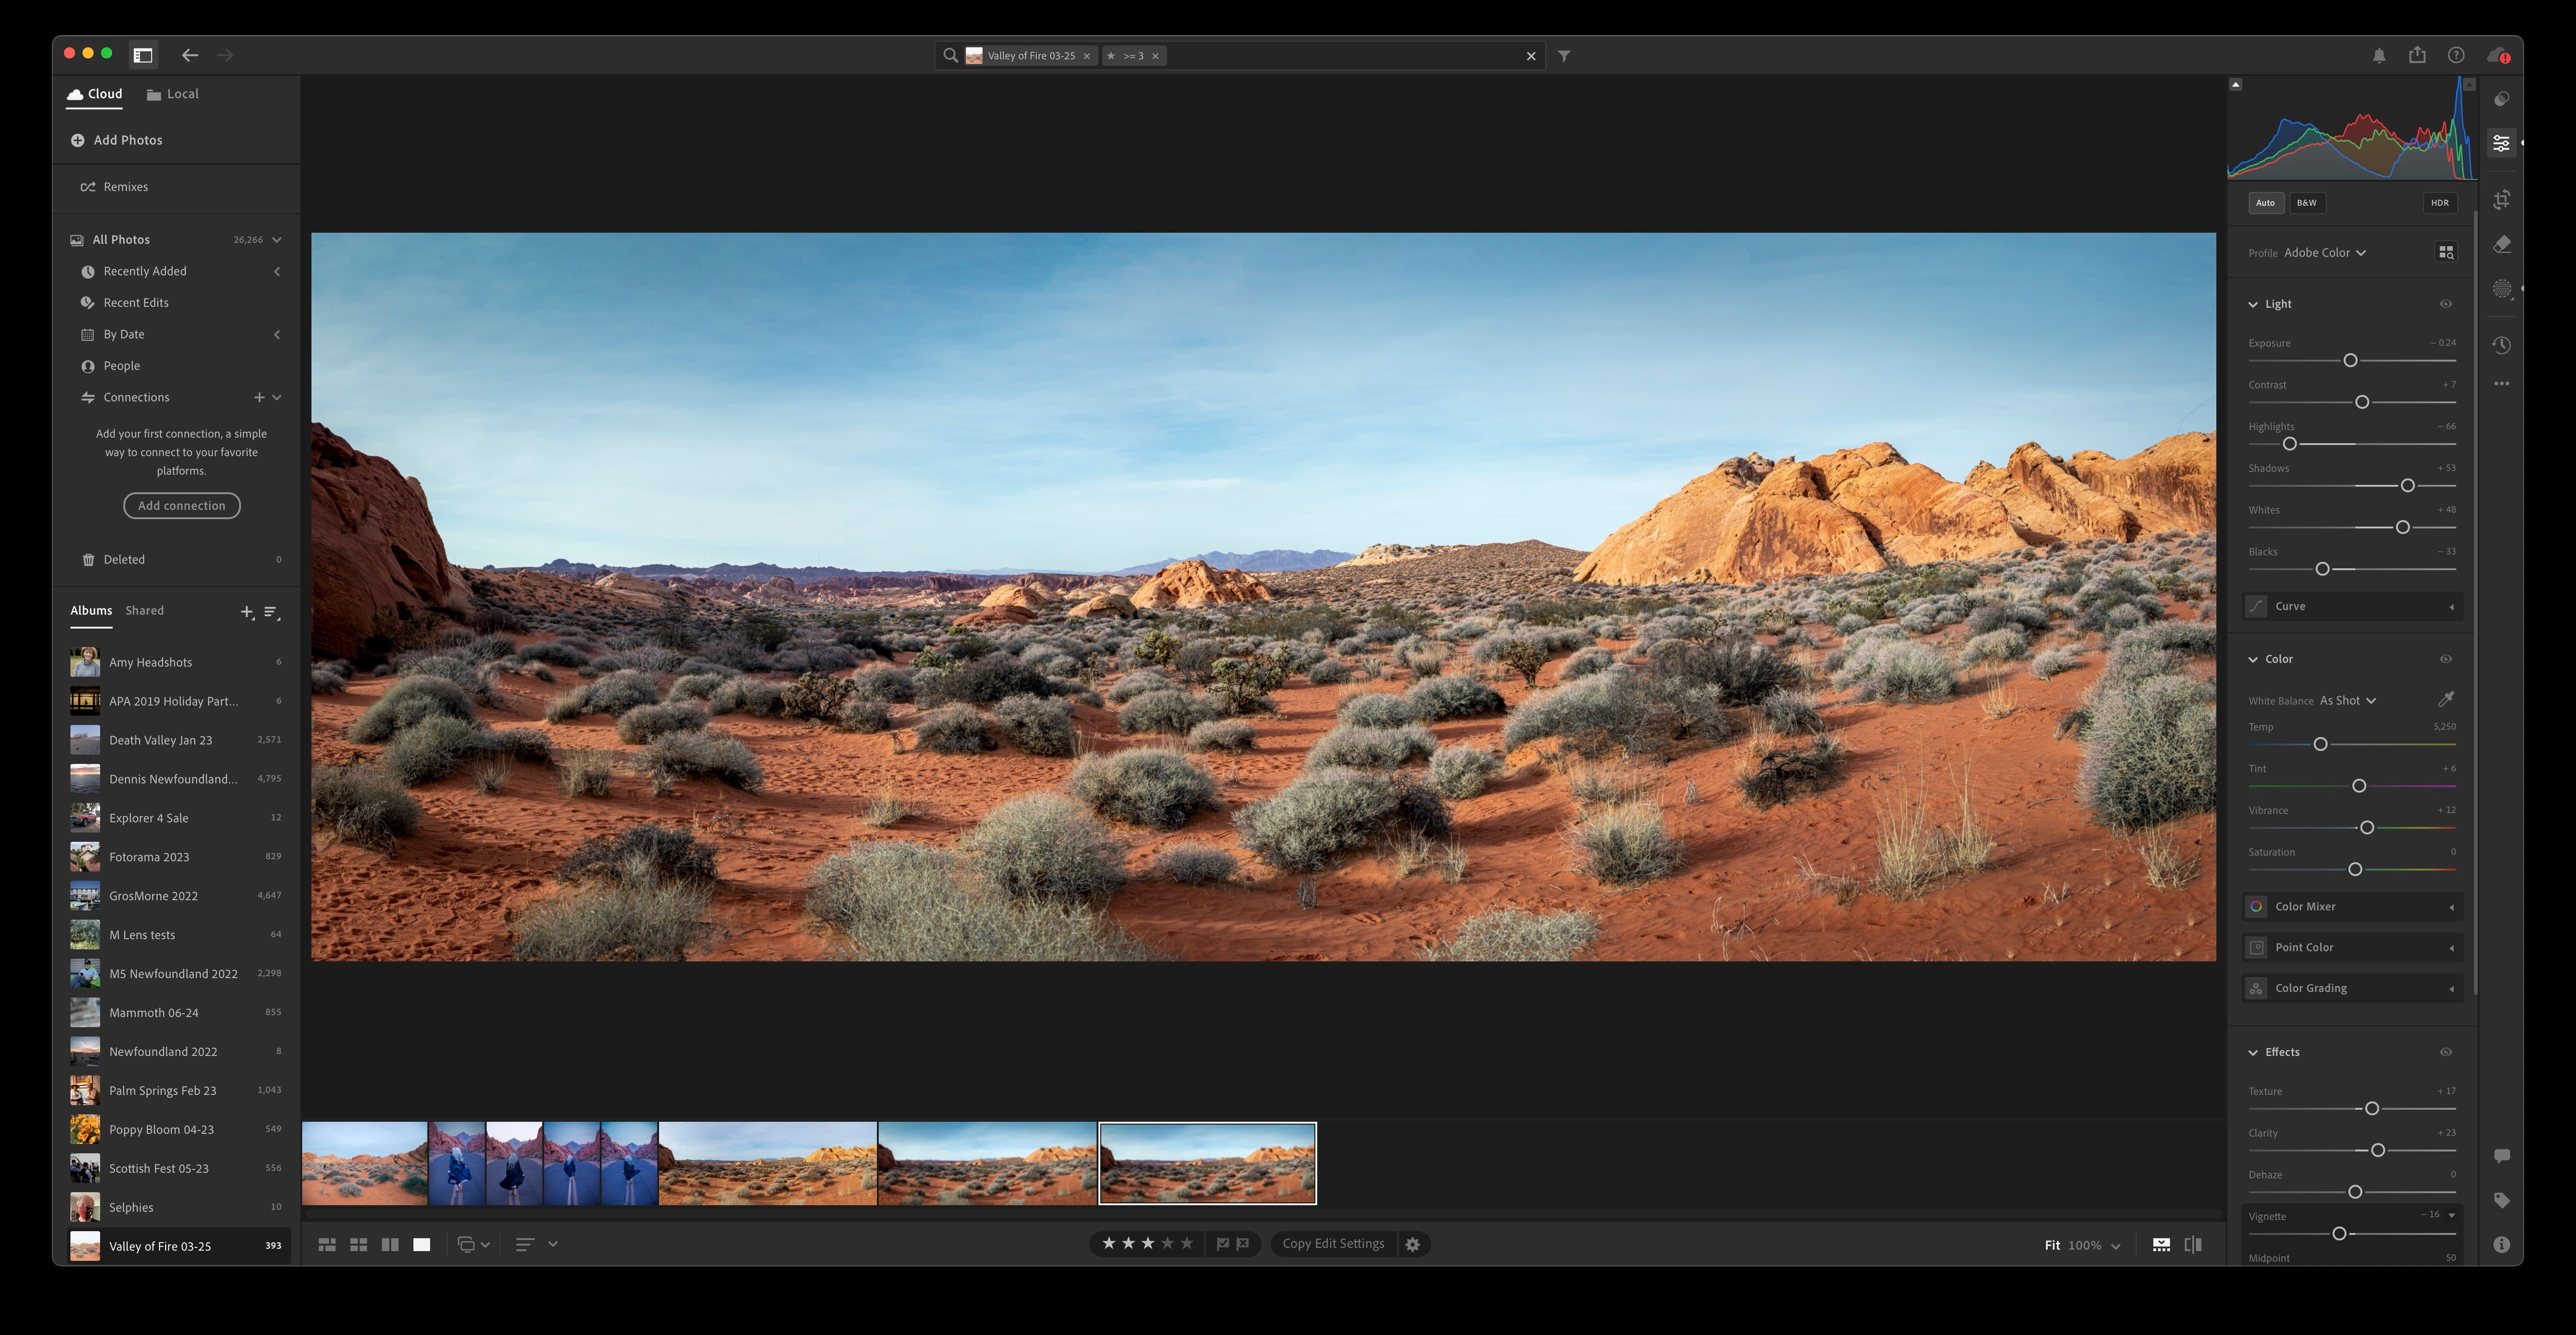
Step 6: Final Touches—Texture, Clarity, and Vignette
Lastly, I added some Clarity to emphasize texture in the rocks and vegetation, and a subtle vignette to draw attention toward the center of the frame. These finishing moves helped bring out the feeling I had standing there: crisp air, glowing ground, and a huge sense of space.
📷 Final polish: Texture and vignette
🎯 The Takeaway
What the camera gives you isn’t always what you felt. But thanks to these new AI-powered masking tools in Lightroom, it’s easier than ever to bring the image back to life—targeting specific areas and making subtle (or bold) adjustments without jumping to Photoshop.
This wasn’t about adding drama—it was about restoring fidelity to memory. And for this shot, that made all the difference.
Lightroom's masking has gotten quite good, but there are still times when it needs some help with manual adjustments or you need to go to Photoshop to use more advanced selection tools. The scene you chose is a relatively easy example for Lightroom masking.
Hi Dennis!
This is a cool post, thanks.
As it is always- for an artist- what you have in your mind’s eye rather than what you see that makes a great created photograph. But this is what you said...
I went to Vegas and lived in Boulder City and Goldfield, NV for a few years to get immersed in the desert- the colors, the smells, the light, the feel. While I’ve been to Utah since the early ’70’s and have hit and shot in all “those places” for that perfect "get the postcard instead" shot, I always felt the City guys that came for a few days here torqued the hell out of the oranges and reds and the blues and now the haze slider way too hard to make the slick rock country visually jump. But HOLD YOUR HORSE, folks! Way too much to be real! Use your histogram- they slam!
You’re doing it here just right- just the way I see it. Just the way it feels.
Best,
Wick